GFS2 Filesystem setup in RHEL8 with Pacemaker and Corosync
We will configure Pacemaker/Corosync to enable the sharing of a disk between two nodes through the GFS2 clustered filesystem.
GFS2 File system
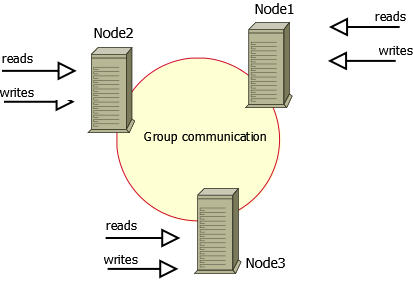
GFS2 (Global File System 2) is a cluster file system designed for use in Linux-based environments. It is an enhanced version of the original GFS (Global File System), which was developed by Red Hat. GFS2 allows multiple servers to have concurrent read and write access to a shared file system, providing high availability and scalability for data storage.
GFS2 is commonly used in scenarios where multiple servers need simultaneous access to a shared file system, such as in high-performance computing (HPC) clusters, database clusters, or virtualization environments. It provides a reliable and scalable solution for managing data across a cluster of Linux servers.
Now lets start the setup.
- Cluster setup with Pacemaker/Corosync
- GFS2 Setup
Various components of the cluster stack (corosync, pacemaker, etc.) has to configured.
Pacemaker:
Pacemaker is a high-availability cluster resource manager — software that runs on a set of hosts (a cluster of nodes) in order to preserve integrity and minimize downtime of desired services (resources).
Corosync:
Corosync is an cluster messaging and membership service that is often used in conjunction with the Pacemaker software to build high availability (HA) clusters. It provides a reliable and scalable communication infrastructure for coordinating and synchronizing the activities of nodes in a cluster. Corosync operates as a cluster messaging layer, enabling the exchange of information and cluster-related events among the nodes.
Cluster setup with Pacemaker/Corosync
We will setup 2 node cluster and share the disk between them.
Nodes:
- ram-01.bidhankhatri.com.np
- ram-02.bidhankhatri.com.np
Prerequisites:
- Update both node with its IP in each other
/etc/hostsfile. Its always recommended to update host details in/etc/hostsfile when you are trying to setup any cluster instead depending upon the external DNS.
vim /etc/hosts
10.12.6.10 ram-01.bidhankhatri.com.np
10.12.6.11 ram-02.bidhankhatri.com.np
- Ensure NTP is set up and synchronize the time between nodes to avoid significant time differences, which could adversely affect cluster performance. Verify this configuration on both nodes.
ntpstat
Now first enable the HighAvailability repo on both nodes and install packages. After that start and enable pcsd, pacemaker and corosync service.
yum install pcs pacemaker fence-agents-all
systemctl enable --now pcsd
systemctl enable --now pacemaker
systemctl enable --now corosync
Enable ports required for HighAvailability
firewall-cmd --permanent --add-service=high-availability
firewall-cmd --reload
The installed packages will create a hacluster user with a disabled password. While this is fine for running pcs commands locally, the account needs a login password in order to perform such tasks as syncing the corosync configuration, or starting and stopping the cluster on other nodes.
[root@ram-01 ~]# passwd hacluster
[root@ram-02 ~]# passwd hacluster
CONFIGURE COROSYNC
On either node, use pcs cluster auth to authenticate as the hacluster user:
[root@ram-01 ~]# pcs host auth ram-01.bidhankhatri.com.np ram-02.bidhankhatri.com.np
Username: hacluster
Password: ******
ram-01.bidhankhatri.com.np: Authorized
ram-02.bidhankhatri.com.np: Authorized
[root@ram-01 ~]#
NOTE: If you are using RHEL7/Centos7 or Fedora then command to authenticate hosts is:
pcs cluster auth ram-01.bidhankhatri.com.np ram-02.bidhankhatri.com.np
Next, use below command on the same node to generate and synchronize the corosync between the cluster nodes. We will be setting “gfs-cluster” as our cluster name.
[root@ram-01 ~]# pcs cluster setup gfs-cluster ram-01.bidhankhatri.com.np ram-02.bidhankhatri.com.np
NOTE: In Centos7, command is:
pcs cluster setup --name gfs-cluster ram-01.bidhankhatri.com.np ram-02.bidhankhatri.com.np
Check cluster status:
[root@ram-01 ~]# pcs cluster status
Cluster Status:
 Status of pacemakerd: 'Pacemaker is running' (last updated 2023-07-07 15:03:12 -04:00)
 Cluster Summary:
  * Stack: corosync
  * Current DC: ram-01.bidhankhatri.com.np (version 2.0.0-10.el8-b67d8d0de9) - partition with quorum
  * Last updated: Fri Jul 7 16:11:18 2023
  * Last change: Fri Jul 7 16:11:00 2023 by hacluster via crmd on ram-01.bidhankhatri.com.np
  * 2 nodes configured
  * 0 resources instances configured
Node List:
  * Online: [ram-01.bidhankhatri.com.np ram-02.bidhankhatri.com.np ]

PCSD Status:
  ram-01.bidhankhatri.com.np: Online
  ram-02.bidhankhatri.com.np: Online
A Red Hat High Availability cluster requires that you configure fencing for the cluster. So before doing the GFS2 setup, we have to configure fencing first.
STONITH SETUP
pcs stonith create vmfence fence_vmware_rest pcmk_host_map="ram-01.bidhankhatri.com.np:ram-01-vm;ram-02.bidhankhatri.com.np:ram-02-vm" ip=http://192.168.2.1 ssl_insecure=1 username="adminuser@bidhankhatri.com.np" password="****" delay=10 pcmk_monitor_timeout=120s
The above provided command is used to create a fencing resource in the Pacemaker cluster manager using the VMware REST API. Fencing, also known as STONITH (Shoot The Other Node In The Head)
pcs stonith create vmfence: This is the command to create a new fencing resource named “vmfence” in Pacemaker.
fence_vmware_rest: This specifies the fence agent to be used, which in this case is the VMware REST API fence agent. This agent allows Pacemaker to communicate with VMware vSphere to fence a misbehaving node.
pcmk_host_map=”ram-01.bidhankhatri.com.np:ram-01-vm;ram-02.bidhankhatri.com.np:ram-02-vm”: This option specifies the mapping between the hostnames of the nodes in the Pacemaker cluster and the corresponding virtual machine (VM) names in the VMware environment. It indicates which VM corresponds to which cluster node.
ip=http://192.168.2.1 This option specifies the IP address or hostname of the VMware vCenter server.
ssl_insecure=1: This option tells the fence agent to ignore SSL certificate validation errors. Use this option only if you have a self-signed or untrusted SSL certificate on your vCenter server.
username=”adminuser@bidhankhatri.com.np”: This option specifies the username to authenticate with the VMware vCenter server.
GFS2 SETUP
Enable repo: rhel-8-for-x86_64-resilientstorage-rpms
On both nodes of the cluster, install the lvm2-lockd, gfs2-utils, and dlm packages.
yum install lvm2-lockd gfs2-utils dlm
On both nodes of the cluster, set the use_lvmlockd configuration option in the /etc/lvm/lvm.conf file to use_lvmlockd=1.
use_lvmlockd=1
Set the global Pacemaker parameter no-quorum-policy to freeze.
[root@ram-01 ~]# pcs property set no-quorum-policy=freeze
By default, when quorum is lost, all resources on the remaining partition are immediately stopped. This is the safest and most optimal option, but GFS2 requires quorum to function. If quorum is lost, both GFS2 applications and the GFS2 mount cannot be stopped correctly. To solve this, set no-quorum-policy to freeze when using GFS2. This means the remaining partition will remain inactive until quorum is regained.
To configure a GFS2 file system in a cluster, it is necessary to establish a dlm resource, which is a mandatory dependency. In this case, the provided example creates the dlm resource within a resource group called "locking."
[root@ram-01 ~]# pcs resource create dlm --group locking ocf:pacemaker:controld op monitor interval=30s on-fail=fence
Clone the locking resource group so that the resource group can be active on both nodes of the cluster.
pcs resource clone locking interleave=true
Set up an lvmlockd resource as part of the locking resource group.
pcs resource create lvmlockd --group locking ocf:heartbeat:lvmlockd op monitor interval=30s on-fail=fence
Check the status of the cluster to ensure that the locking resource group has started on both nodes of the cluster.
# pcs status --full

Cluster name: gfs-cluster
Status of pacemakerd: 'Pacemaker is running' (last updated 2023-07-09 08:03:40 -04:00)
Cluster Summary:
  * Stack: corosync
  * Current DC: ram-01.bidhankhatri.com.np (version 2.1.4-5.e18_7.2-dc6eb4362e) - partition with quorum
  * Last updated: Sun Jul 09 08:03:41 2023
  * Last change: Sun Jul 9 08:03:37 2023 by root via cibadmin on ram-01.bidhankhatri.com.np
  * 2 ndoes configured
  * 5 resource instances configured

Node List:
  * Online: [ ram-01.bidhankhatri.com.np (1) ram-02.bidhankhatri.com.np (2) ]

Full List of Resources:
  * Clone Set: locking-clone [locking]:
    * Resource Group: locking:0:
      * dlm    (ocf::pacemaker:controld):       Started ram-01.bidhankhatri.com.np
      * lvmlockd    (ocf:pacemaker:lvmlockd):         Started ram-01.bidhankhatri.com.np
    * Resource Group: locking:1:
      * dlm    (ocf::pacemaker:controld):       Started ram-02.bidhankhatri.com.np
      * lvmlockd    (ocf:pacemaker:lvmlockd):         Started ram-02.bidhankhatri.com.np
  * vmfence     (stonith:fence_vmware_rest):    started ram-01.bidhankhatri.com.np

Migrration Summary:

Tickets:

PCSD Status:
  ram-01.bidhankhatri.com.np: Online
  ram-02.bidhankhatri.com.np: Online

Daemon Status:
  corosync: active/enabled
  pacemaker: active/enabled
  pcsd: active/enabled
On one node, create a shared volume group. Create volume group "shared_vg"
vgcreate --shared shared_vg /dev/sdb
  Physical volume "/dev/vdb" successfully created.
  Volume group "shared_vg" successfully created
  VG shared_vg starting dlm lockspace
  Starting locking.  Waiting until locks are ready...
In 2nd node.
vgchange --lockstart shared_vg
  VG shared_vg starting dlm lockspace
  Starting locking.  Waiting until locks are ready...
lvcreate --activate sy -l 100%FREE -n shared_lv shared_vg
  Logical volume "shared_lv" created.
[root@ram-01 ~]# mkfs.gfs2 -j2 -p lock_dlm -t gfs-cluster:gfs2 /dev/shared_vg/shared_lv
/dev/shared-vg is a symbolic link to /dev/dm-7
this will destory any data on /dev/dm-7
Are you sure you want to proceed? [y/n] y
Discarding device contents (may take a while on large devices): Done
Adding journals: Done
Building resource groups: Done
Creating quota file: Done
Writing superblock and syncing: Done
Device:              /dev/shared_vg/shared_lv
Block size:          4096
Device size:         8.00 GB (2096128 blocks)
Filesystem size:     8.00 GB (2096128 blocks)
Journals:            2
Journal size:        32MB
Resource groups:     34
Locking protocol:    "lock_dlm"
Lock table:          "gfs-cluster:gfs2"
UUID:                6c5a011c-188a-48d1-adc8-774b256b2850
• -p lock_dlm specifies that we want to use the kernel’s DLM.
• -j 2 indicates that the filesystem should reserve enough space for two journals (one for each node that will access the filesystem).
• -t gfs-cluster:gfs2 specifies the lock table name. The format for this field is
clustername:fsname.
For clustername, we need to use the same value we specified originally with pcs cluster setup (which is also the value of cluster_name in /etc/corosync/corosync.conf). If you are unsure what your cluster name is, you can look in /etc/corosync/corosync.conf or execute the command.
pcs cluster corosync ram-01.bidhankhatri.com.np | grep -i "Cluster name".
Create an LVM-activate resource for logical volume to automatically activate that logical volume on all nodes.
Create an LVM-activate resource named sharedlv for the logical volume shared_lv in volume group shared_vg.
Below command creates a Pacemaker cluster resource called “sharedlv” that manages a logical volume named “shared_lv” belonging to the volume group “shared_vg.” The resource agent used is “ocf:heartbeat:LVM-activate,” and the LV is configured to be activated in shared mode, allowing multiple nodes to access it concurrently. The VG access mode is set to “lvmlockd” to enable distributed locking for concurrent VG access.
pcs resource create sharedlv --group shared_vg ocf:heartbeat:LVM-activate lvname=shared_lv vgname=shared_vg activation_mode=shared vg_access_mode=lvmlockd
pcs: It stands for “Pacemaker Configuration System” and refers to the command-line tool used for managing Pacemaker clusters.
resource create: This command is used to create a new resource in the Pacemaker cluster.
sharedlv: It is the name given to the resource being created.
–group shared_vg: It specifies that the resource should be added to the resource group named “shared_vg.” A resource group is a logical grouping of resources that are managed together.
ocf:heartbeat:LVM-activate: It specifies the resource agent to be used for managing the shared logical volume. In this case, the Heartbeat OCF resource agent is used. The LVM-activate resource agent is responsible for activating an LVM logical volume.
lvname=shared_lv: It specifies the name of the logical volume to be managed by the resource. In this case, the LV is named “shared_lv.”
vgname=shared_vg: It specifies the name of the volume group (VG) to which the logical volume belongs. In this case, the VG is named “shared_vg.”
activation_mode=shared: It specifies the activation mode for the LV. “Shared” mode indicates that the LV can be activated by multiple nodes simultaneously.
vg_access_mode=lvmlockd: It specifies the access mode for the volume group. "lvmlockd" is a locking daemon that provides a distributed lock manager for LVM, allowing multiple nodes to access the VG concurrently.
Clone the new resource group.
pcs resource clone shared_vg interleave=true
Configure ordering constraints to ensure that the locking resource group that includes the dlm and lvmlockd resources starts first.
[root@ram-01 ~]# pcs constraint order start locking-clone then shared_vg-clone
Configure colocation constraints to ensure that the vg resource group start on the same node as the locking resource group.
[root@ram-01 ~]# pcs constraint colocation add shared_vg-clone with locking-clone
On both nodes in the cluster, verify that the logical volumes are active. There may be a delay of a few seconds.
[root@ram-01 ~]# lvs
  LV         VG          Attr       LSize
  shared_lv shared_vg  -wi-ao-----  <8.00g

[root@ram-02 ~]# lvs
  LV         VG          Attr       LSize
  shared_lv shared_vg  -wi-ao-----  <8.00g
Create a file system resource to automatically mount each GFS2 file system on all nodes. You should not add the file system to the /etc/fstab file because it will be managed as a Pacemaker cluster resource.
Create a file system resource to automatically mount each GFS2 file system on all nodes. You should not add the file system to the /etc/fstab file because it will be managed as a Pacemaker cluster resource.
pcs resource create sharedfs --group shared_vg ocf:heartbeat:Filesystem device="/dev/shared_vg/shared_lv" directory="/app" fstype="gfs2" options=noatime op monitor interval=10s on-fail=fence
resource create: This command is used to create a new resource in the Pacemaker cluster.
sharedfs: It is the name given to the resource being created.
–group shared_vg: It specifies that the resource should be added to the resource group named “shared_vg.”
ocf:heartbeat:Filesystem: It specifies the resource agent to be used for managing the filesystem resource. In this case, the Heartbeat OCF resource agent for Filesystem is used.
device=”/dev/shared_vg/shared_lv”: It specifies the device associated with the filesystem resource. In this case, the filesystem is located on the logical volume /dev/shared_vg/shared_lv.
directory=”/app”: It specifies the directory where the filesystem should be mounted. In this case, the filesystem will be mounted on the directory /app.
fstype=”gfs2”: It specifies the filesystem type. In this case, the filesystem type is “gfs2,” which stands for Global File System 2.
options=acl,noatime: Specifies the mount options for the filesystem. The acl option enables Access Control Lists (ACLs), which provide more granular access control on files and directories. The noatime option disables updating the access time for files when they are accessed, potentially improving performance.
op monitor interval=10s on-fail=fence: It defines the resource’s monitoring behavior. The monitor operation will be performed on the resource every 10 seconds (interval=10s). If the monitor operation fails, the node where the resource is running will be fenced (on-fail=fence), indicating a failure and allowing the resource to be recovered on another node.
Verification steps:
mount | grep gfs2
/dev/mapper/shared_vg-shared_lv on /app type gfs2 (rw,noatime,acl)

mount | grep gfs2
/dev/mapper/shared_vg-shared_lv on /app type gfs2 (rw,noatime,acl)

df -h /mnt/gfs/
Filesystem                       Size    Used   Avail   Use%  Mounted on
/dev/mapper/shared_vg-shared_lv  8.0G    67M    8.0G    1%    /app
check cluster status:
# pcs status --full

Cluster name: gfs-cluster
Status of pacemakerd: 'Pacemaker is running' (last updated 2023-07-09 08:03:40 -04:00)
Cluster Summary:
  * Stack: corosync
  * Current DC: ram-01.bidhankhatri.com.np (version 2.1.4-5.e18_7.2-dc6eb4362e) - partition with quorum
  * Last updated: Sun Jul 09 08:03:41 2023
  * Last change: Sun Jul 9 08:03:37 2023 by root via cibadmin on ram-01.bidhankhatri.com.np
  * 2 ndoes configured
  * 9 resource instances configured

Node List:
  * Online: [ ram-01.bidhankhatri.com.np (1) ram-02.bidhankhatri.com.np (2) ]

Full List of Resources:
  * Clone Set: locking-clone [locking]:
    * Resource Group: locking:0:
      * dlm    (ocf::pacemaker:controld):       Started ram-01.bidhankhatri.com.np
      * lvmlockd    (ocf:pacemaker:lvmlockd):         Started ram-01.bidhankhatri.com.np
    * Resource Group: locking:1:
      * dlm    (ocf::pacemaker:controld):       Started ram-02.bidhankhatri.com.np
      * lvmlockd    (ocf:pacemaker:lvmlockd):         Started ram-02.bidhankhatri.com.np
  * vmfence     (stonith:fence_vmware_rest):    started ram-01.bidhankhatri.com.np
  * Clone Set: shared_vg-clone [shared_vg]:
    * Resource Group: shared_vg:0:
      * sharedlv    (ocf::heartbeat:LVM-activate):       Started ram-01.bidhankhatri.com.np
      * sharedfs    (ocf:heartbeat:Filesystem):         Started ram-01.bidhankhatri.com.np
    * Resource Group: shared_vg:1:
      * sharedlv    (ocf::heartbeat:LVM-activate):       Started ram-02.bidhankhatri.com.np
      * sharedfs    (ocf:heartbeat:Filesystem):         Started ram-02.bidhankhatri.com.np

Migrration Summary:

Tickets:

PCSD Status:
  ram-01.bidhankhatri.com.np: Online
  ram-02.bidhankhatri.com.np: Online

Daemon Status:
  corosync: active/enabled
  pacemaker: active/enabled
  pcsd: active/enabled


Comments