SAML Authentication for AWS OpenSearch with Okta and Role mapping
Updated:
We are going to set up IdP-initiated (Okta) SAML authentication for AWS OpenSearch. We will create two Okta groups: “opensearch-admin” and “opensearch-user,” and define different roles for OpenSearch.
Introduction
SAML authentication for OpenSearch Dashboards allows you to utilize your existing identity provider for offering single sign-on (SSO) on Amazon OpenSearch Service domains running OpenSearch or Elasticsearch 6.7 or later. To enable SAML authentication, fine-grained access control must be enabled.
Instead of authenticating through Amazon Cognito or the internal user database, SAML authentication for OpenSearch Dashboards allows you to utilize third-party identity providers to log in, manage fine-grained access control, search your data, and create visualizations. OpenSearch Service supports providers that adhere to the SAML 2.0 standard, including Okta, Keycloak, Active Directory Federation Services (ADFS), Auth0, and AWS IAM Identity Center (the successor to AWS Single Sign-On).
SAML authentication for Dashboards is specifically designed for accessing OpenSearch Dashboards through a web browser. It’s important to note that your SAML credentials cannot be used to directly make HTTP requests to the OpenSearch or Dashboards APIs.
SAML configuration overview
This documentation assumes that you have an existing identity provider and some familiarity with it.
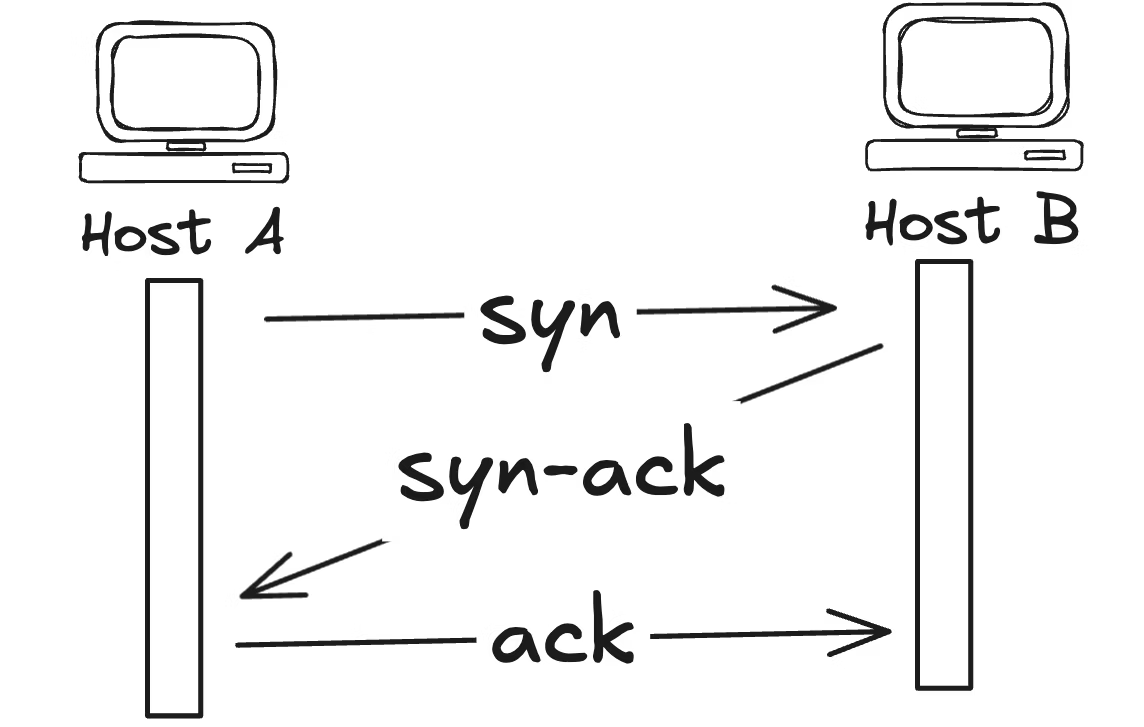
The OpenSearch Dashboards login flow can take one of two forms:
- Service provider (SP) initiated: You navigate to Dashboards (for example, https://my-domain.us-east-1.es.amazonaws.com/_dashboards), which redirects you to the login screen. After you log in, the identity provider redirects you to Dashboards.
- Identity provider (IdP) initiated: You navigate to your identity provider ( E.g Okta), log in, and choose OpenSearch Dashboards from an application directory.
OpenSearch Service provides two single sign-on URLs, SP-initiated and IdP-initiated, but you only need the one that matches your desired OpenSearch Dashboards login flow. Here In our case, We are going to setup IdP initiated setup.
Regardless of the authentication type you choose, the objective is to log in through your identity provider and obtain a SAML assertion that includes your username (required) and any backend roles (optional, but recommended). This information enables fine-grained access control to assign permissions to SAML users. In external identity providers, backend roles are commonly referred to as ‘roles’ or ‘groups’.
STEPS:
- Identity Provider (Okta) setup
- Prepare OpenSearch Service for SAML configuration
- SAML configuration in OpenSearch Service Domain and Okta
- Validate Okta users access and role
Identity Provider (Okta) setup
( Create 2 groups “opensearch-admin” and “opensearch-user” and assign users to it. )
- Signup for Okta Account
- Create Users in Okta
- Create Groups in Okta
- Assign Users to Groups
Login to your Okta Admin page. If you don’t have Okta then you can singup for Okta free trial account which will be valid for 30 days. To get trail access, go to this page and fill the form. https://www.okta.com/free-trial/
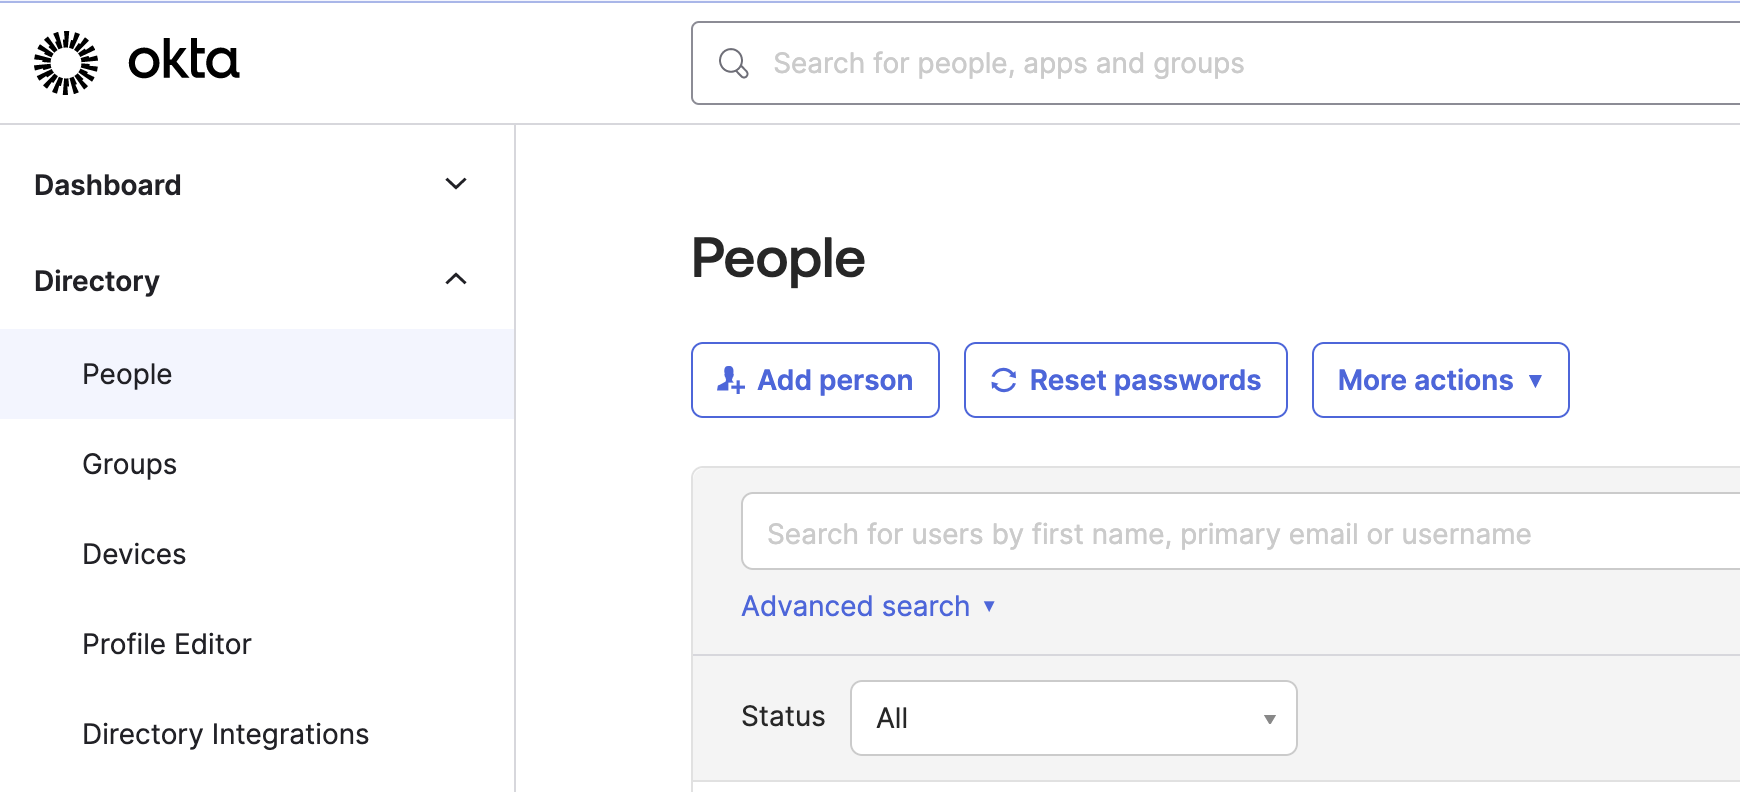
Create Users in Okta: Directory » People » Add Person
Create multiple users according to your need. Here we created 2 users “bidhan.khatri” and “ram.thapa”
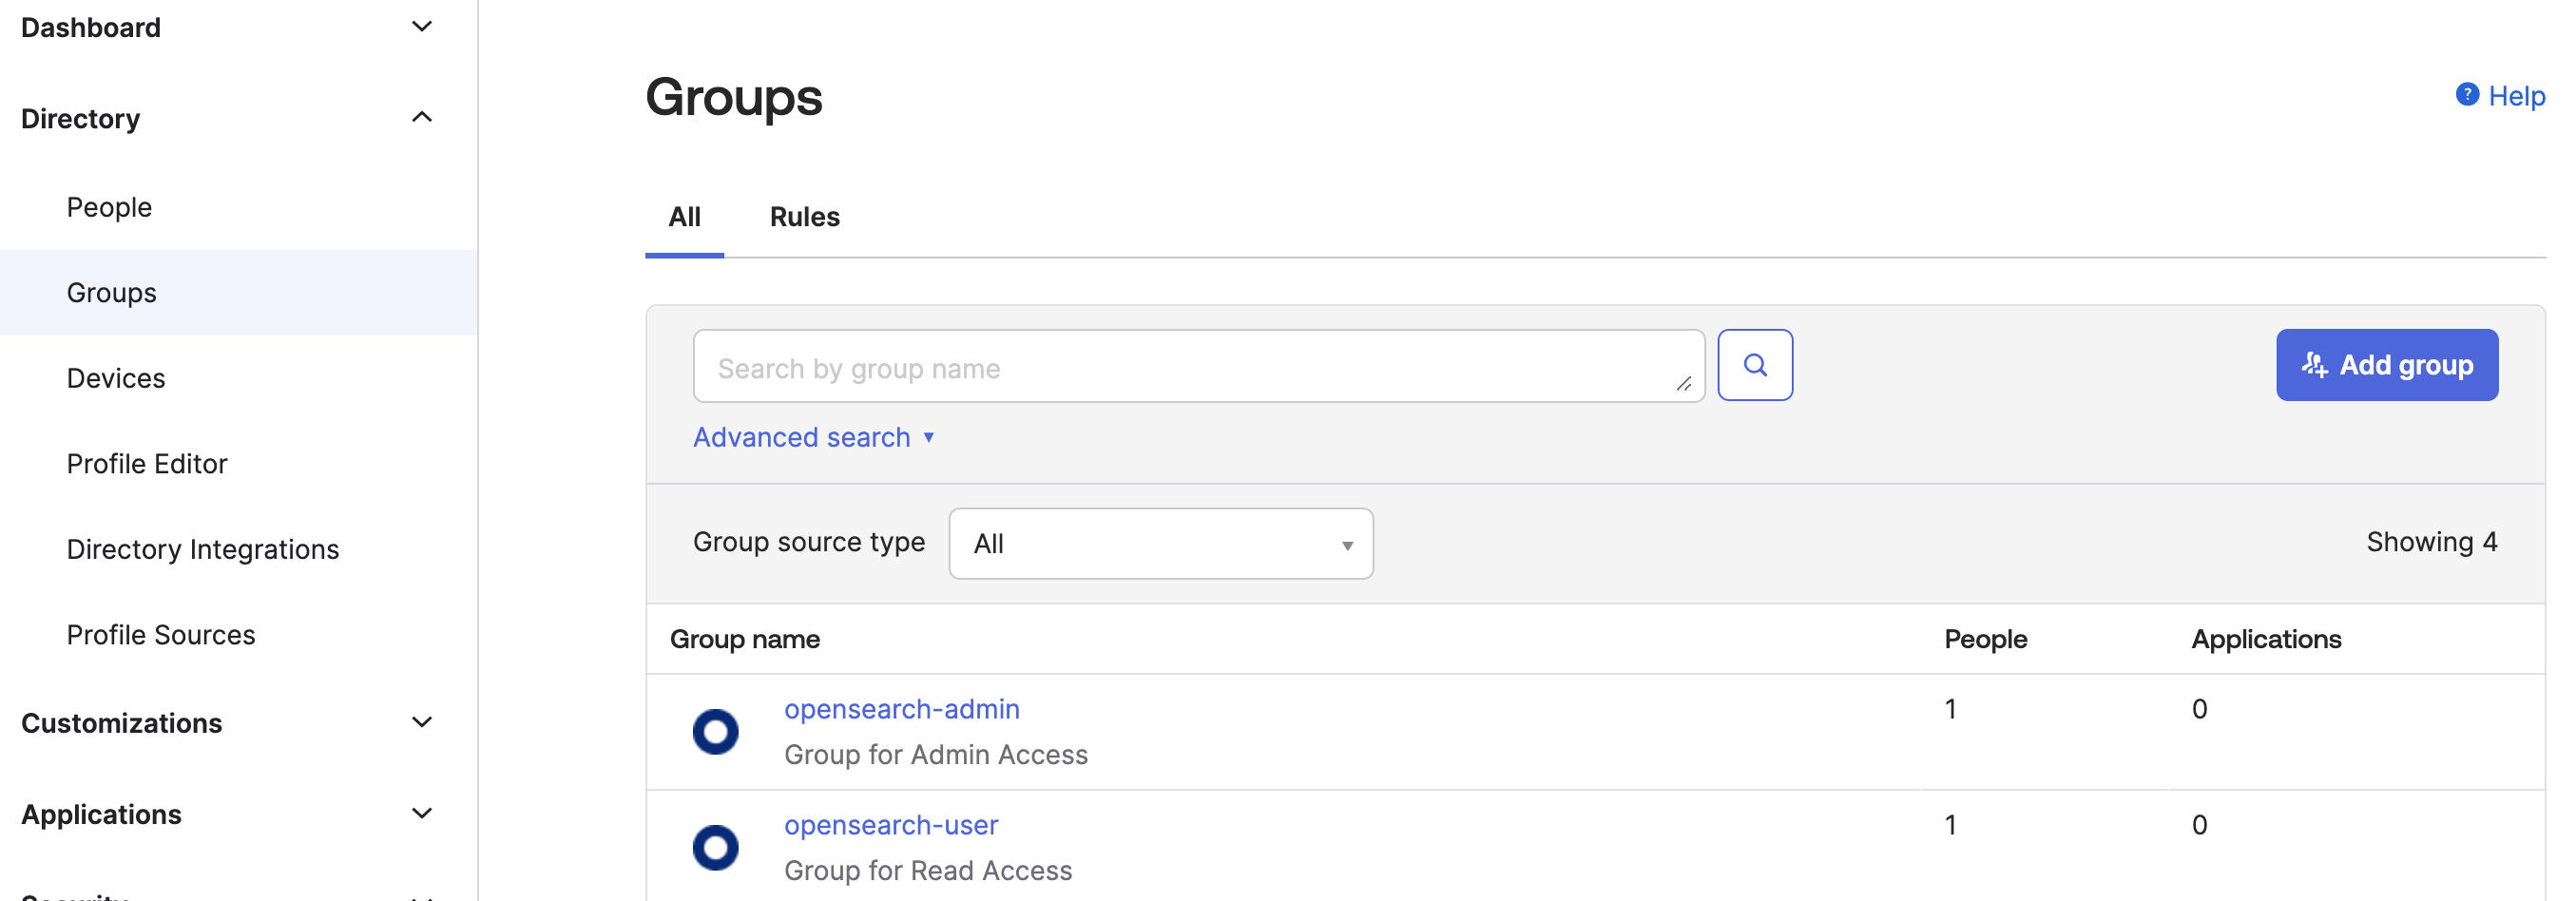
Create Groups in Okta: Directory » Groups » Add Group
We will create 2 groups: “opensearch-admin” and “opensearch-user.”
Assign user “bidhan.khatri” to “opensearch-admin” and user “ram.thapa” to “opensearch-user”.
“opensearch-admin” is a Okta group for admin access in OpenSearch Dashboard and “opensearch-user” for read access which we will configure later.
Assign Users to Groups:
Directory » Groups » opensearch-user » Assign people ( Click + sign of the user “ram.thapa” )
Similary, do for another group.
Directory » Groups » opensearch-admin » Assign people ( select user “bidhan.khatri”)
Create OpenSearch in AWS
If you haven’t created OpenSearch then follow the below steps, otherwise go to next section “SAML configuration in OpenSearch Service Domain and Okta”
Open AWS OpenSearch Service and Click on Create domain.
Domain Name: bdn
Domain Created Method: Standard create
Templates: Dev/test
Deployment Options(s): Domain without standby
Availability Zones(s): 1-AZ
Engine options: 2.5(latest)
Data nodes: t3.small.search
Number of Nodes: 1
Storage Type: EBS
EBS storage size per node: 10G
Network: Public Access
Fine-grained access control: Create master user // This credential will be used for logging opensearch dashboard.
Access Policy: Domain access Policy > Only use fine-grained access control
Other things as default
Now look at the summary and confirm for new domain and click “create”
SAML configuration in OpenSearch Service Domain and Okta
Go to Amazon OpenSearch Service and in your domain. Go to “bdn Domain”
Click on Actions » Edit security configuration
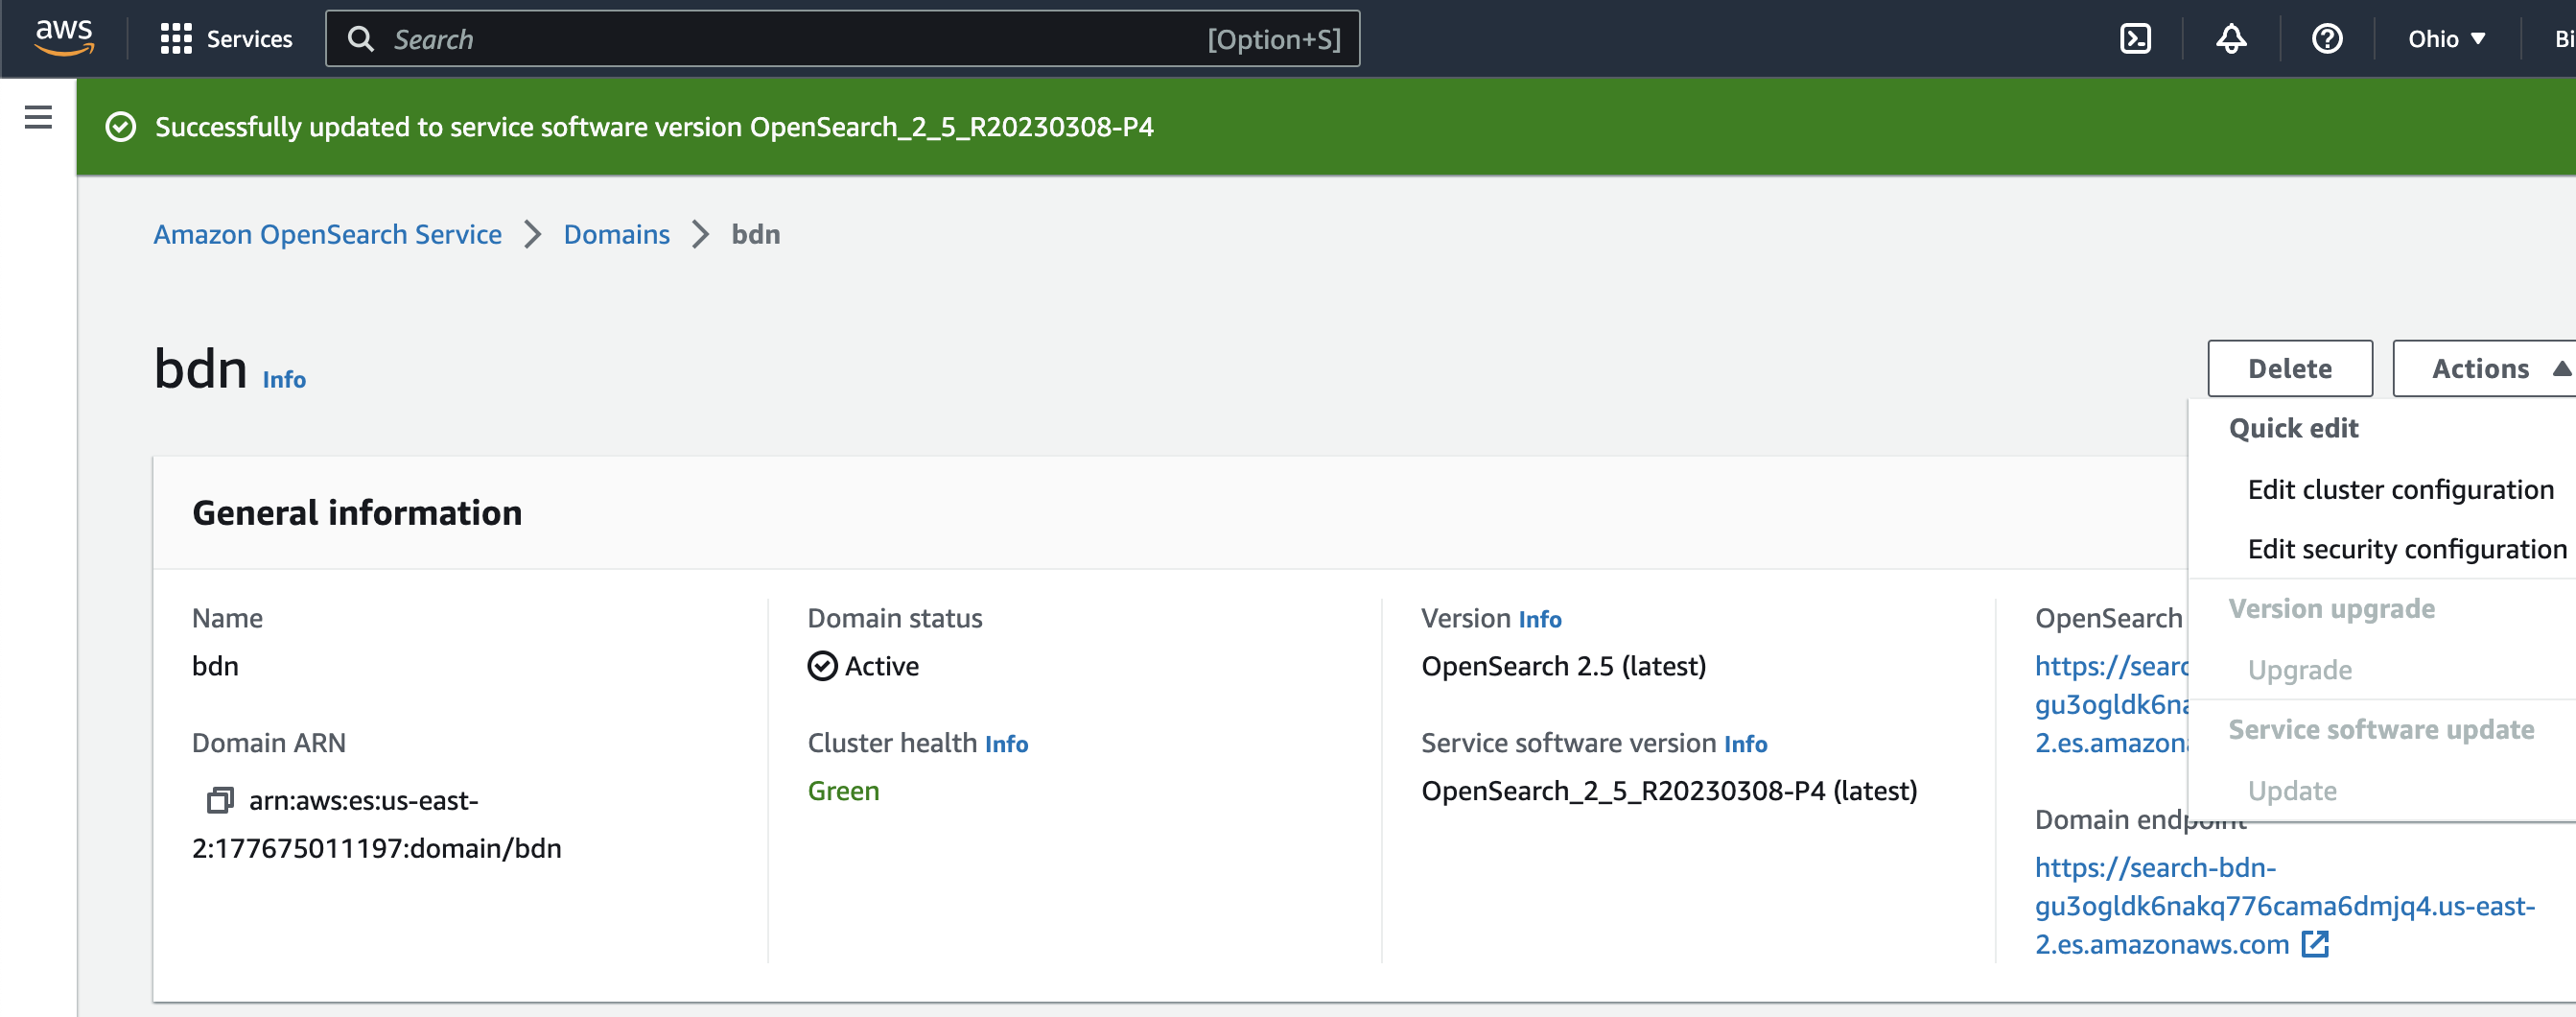
Tick on “Enable SAML Authentication”
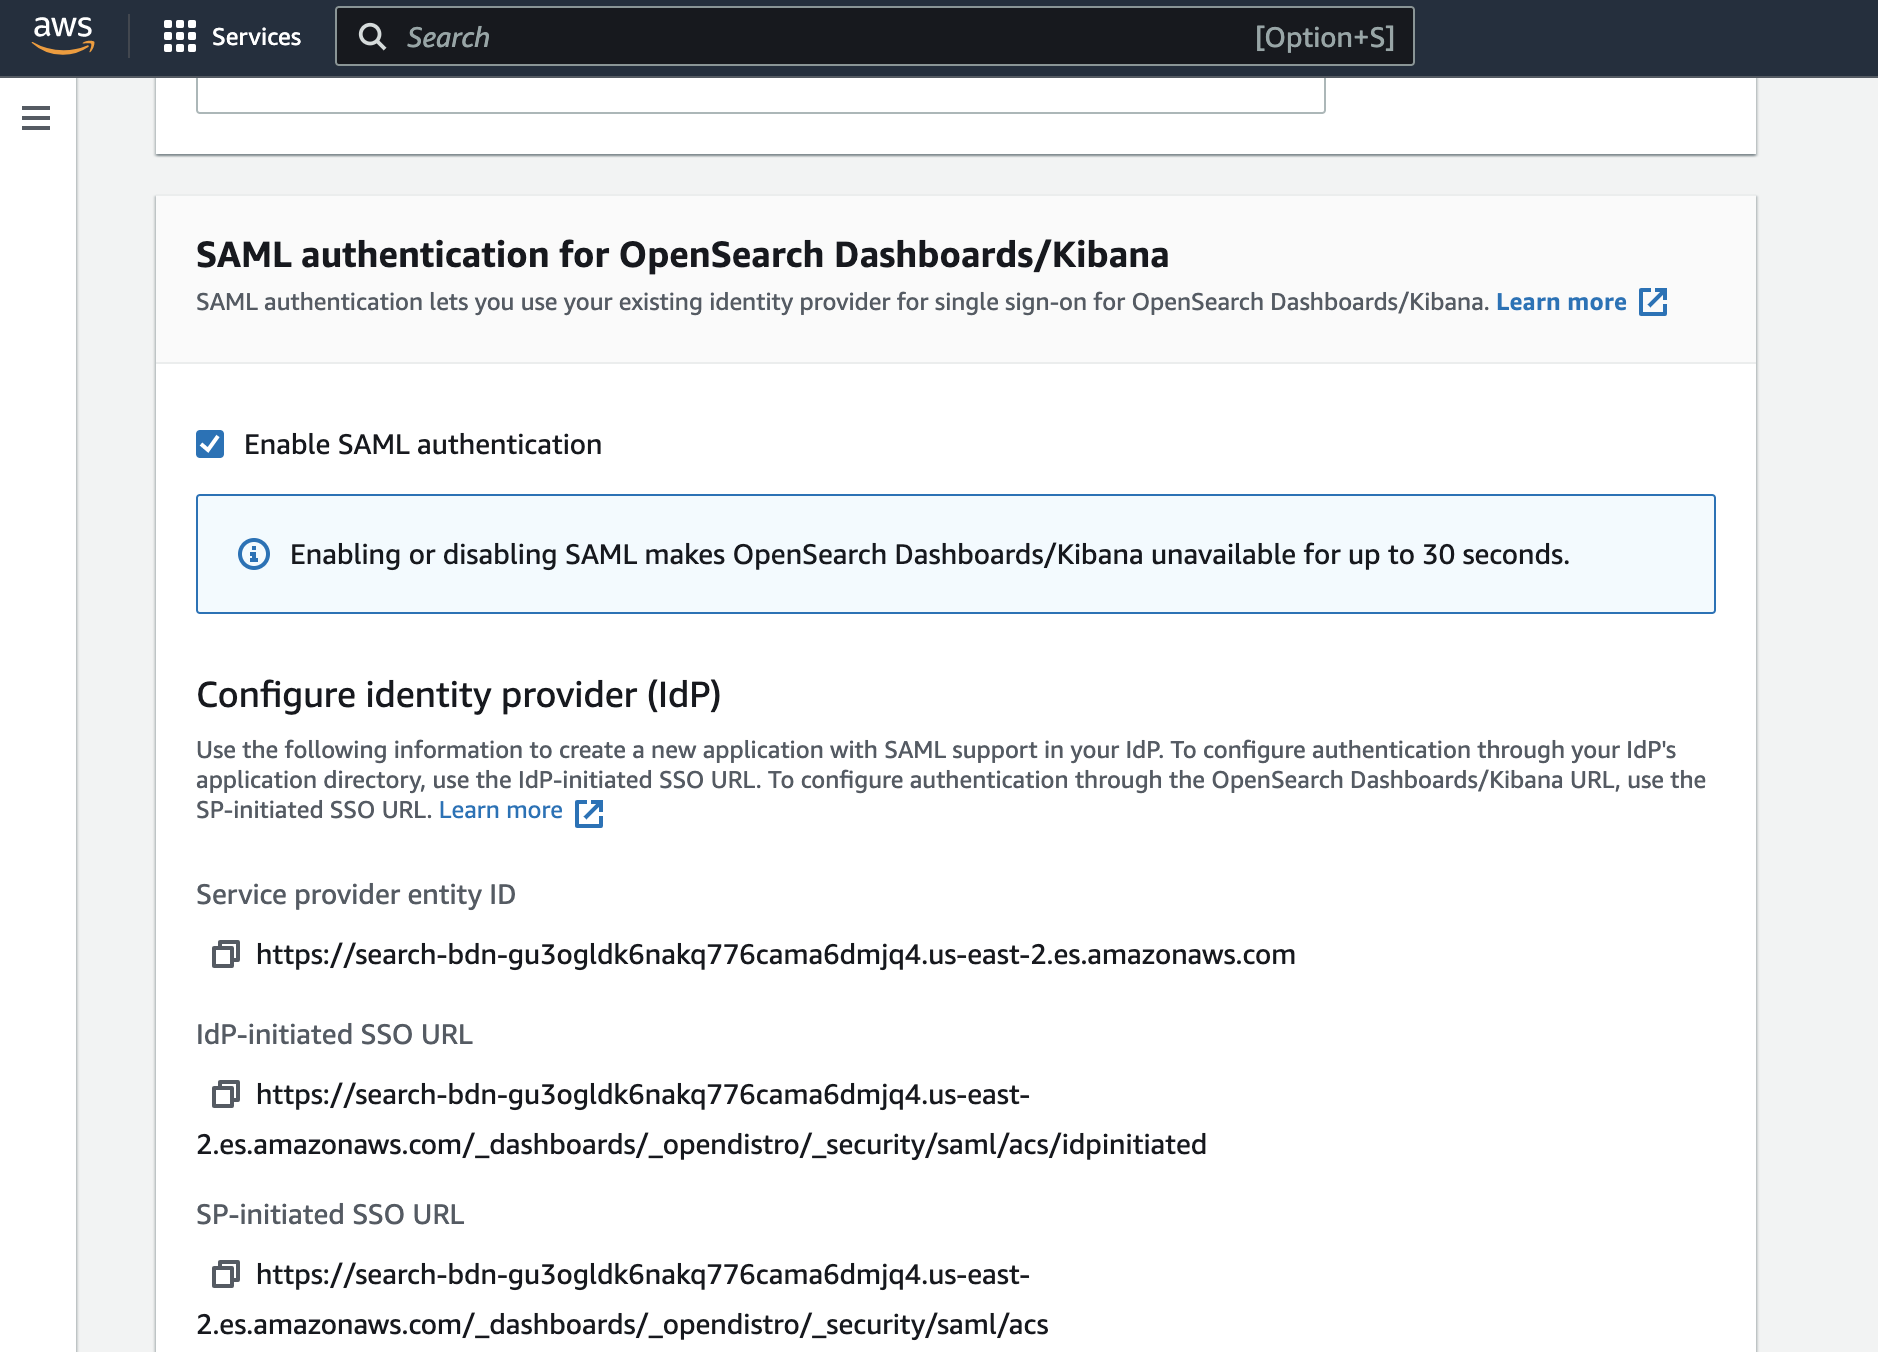
We will be using the Service Provider entity ID and IdP-initiated SSO URL for Okta SAML configuration.
The OpenSearch Dashboards login flows below step:
You navigate to your identity provider (Okta), log in, and choose OpenSearch Dashboards from an application directory.
We will complete rest of the above OpenSearch Service SAML configuration after the Okta SAML configuration.
Above SAML information is required for Okta SAML setup.
Okta SAML Configuration
Go back to your OKTA ADMIN PAGE and choose Applications
Click on Create App Integration Choose SAML 2.0 and click NEXT
App name: OpenSearch
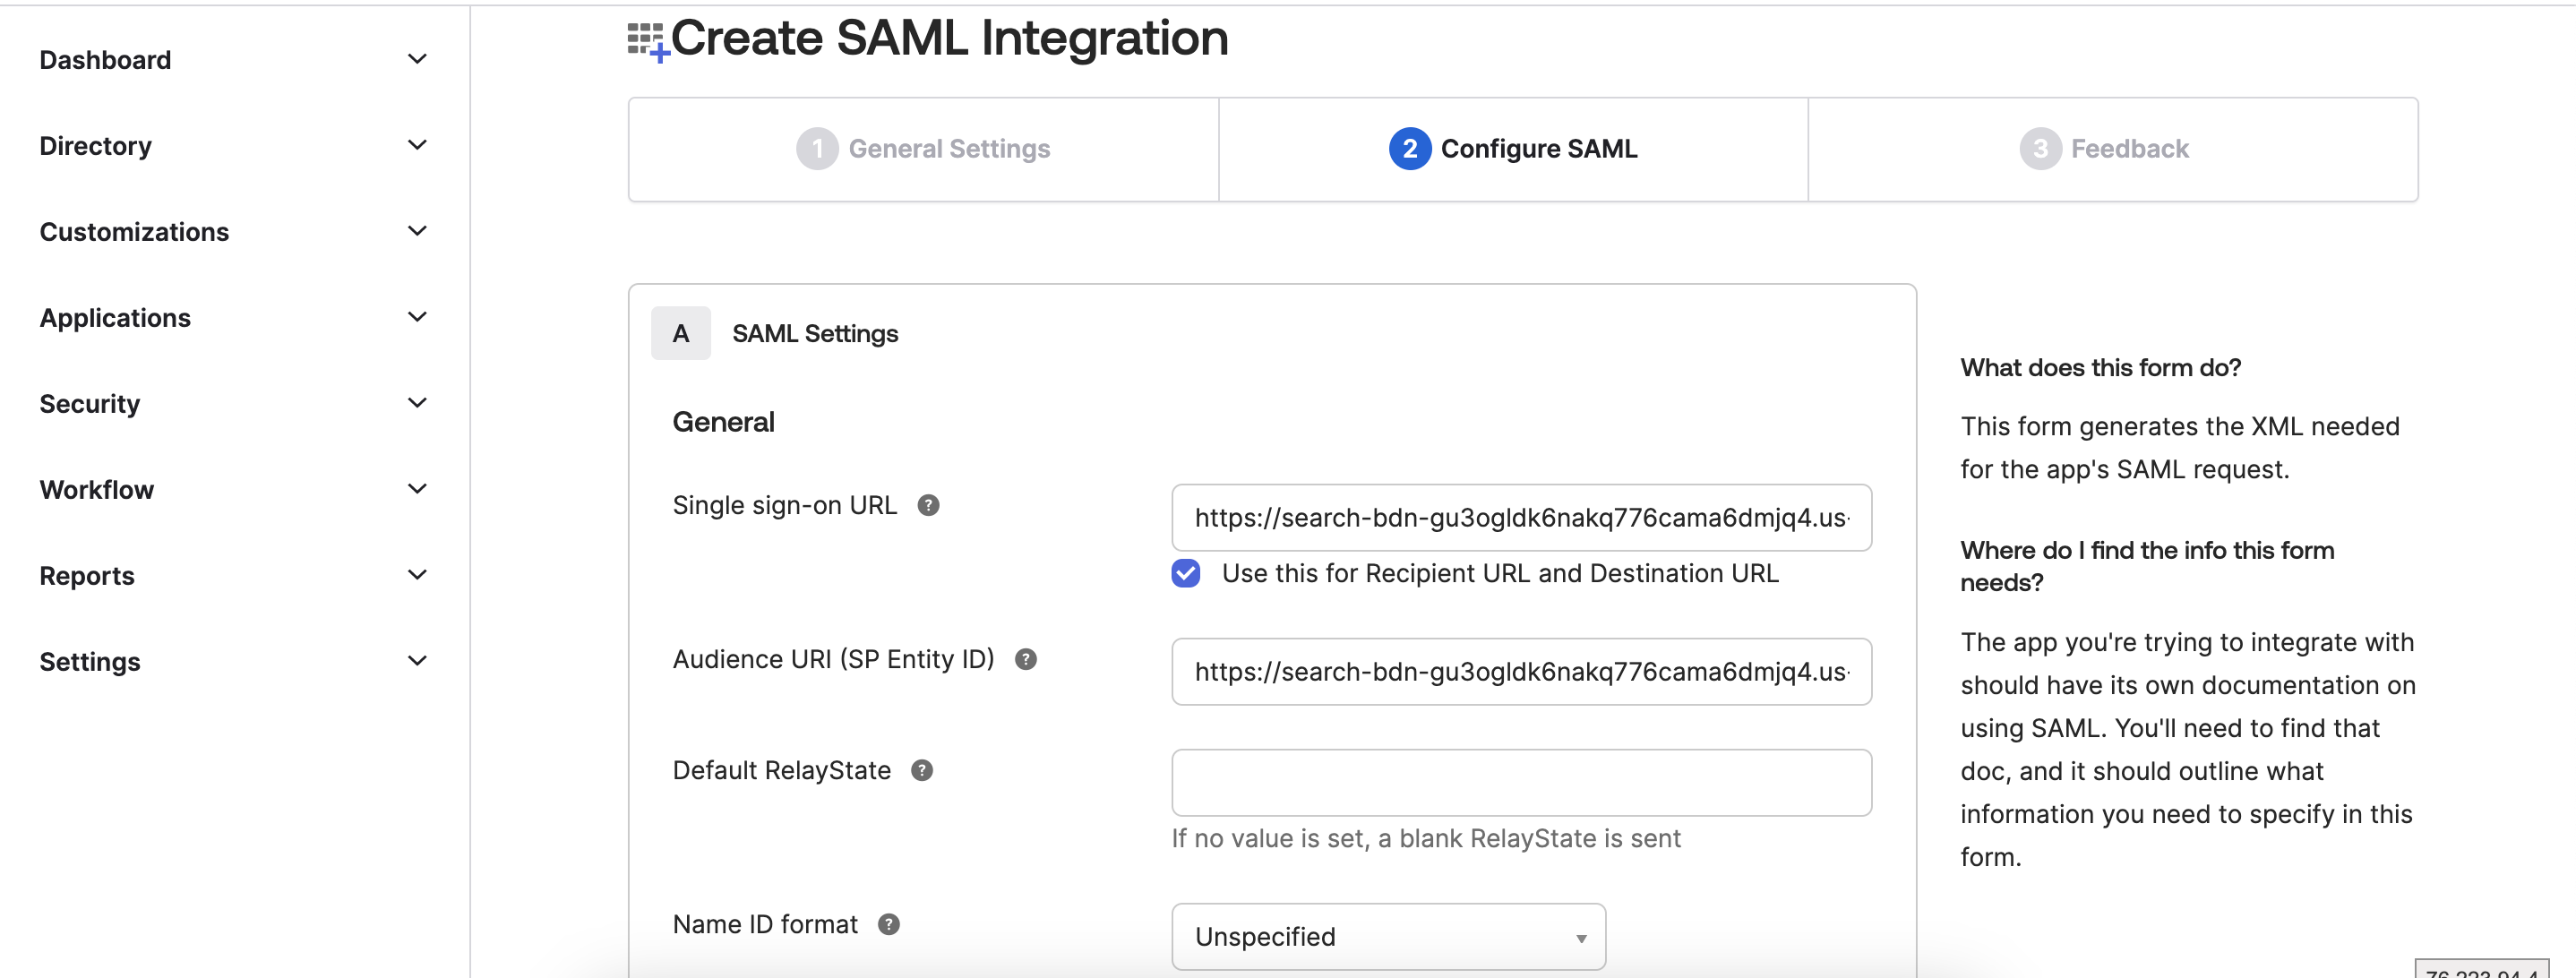
SAML Settings
Single sign-on URL: https://search-bdn-gu3ogldk6nakq776cama6dmjq4.us-east-2.es.amazonaws.com/_dashboards/_opendistro/_security/saml/acs/idpinitiated [ IdP - initiated SSO URL from bdn domain]
Put tick on Use this for Recipient URL and Destination URL
Audience URI (SP Entity ID): https://search-bdn-gu3ogldk6nakq776cama6dmjq4.us-east-2.es.amazonaws.com [ Service provider entity ID from bdn domain]
( Both URL’s are copied from SAML configuration in OpenSearch Service Domain )
Default RelayState: leave it blank
Name ID format: Select EmailAdress from drop down
Application Username: Okta username
Update application username on: Create and update
Attribute Statements (optional)
Name: http://schemas.xmlsoap.org/ws/2005/05/identity/claims/emailaddress
Name: Select URI Reference from dropdown
value: user.email
Group Attribute Statements (optional)
Name:http://schemas.xmlsoap.org/claims/Group
Normal Format: Unspecified
Filter: Starts with “opensearch”
Now click on Next
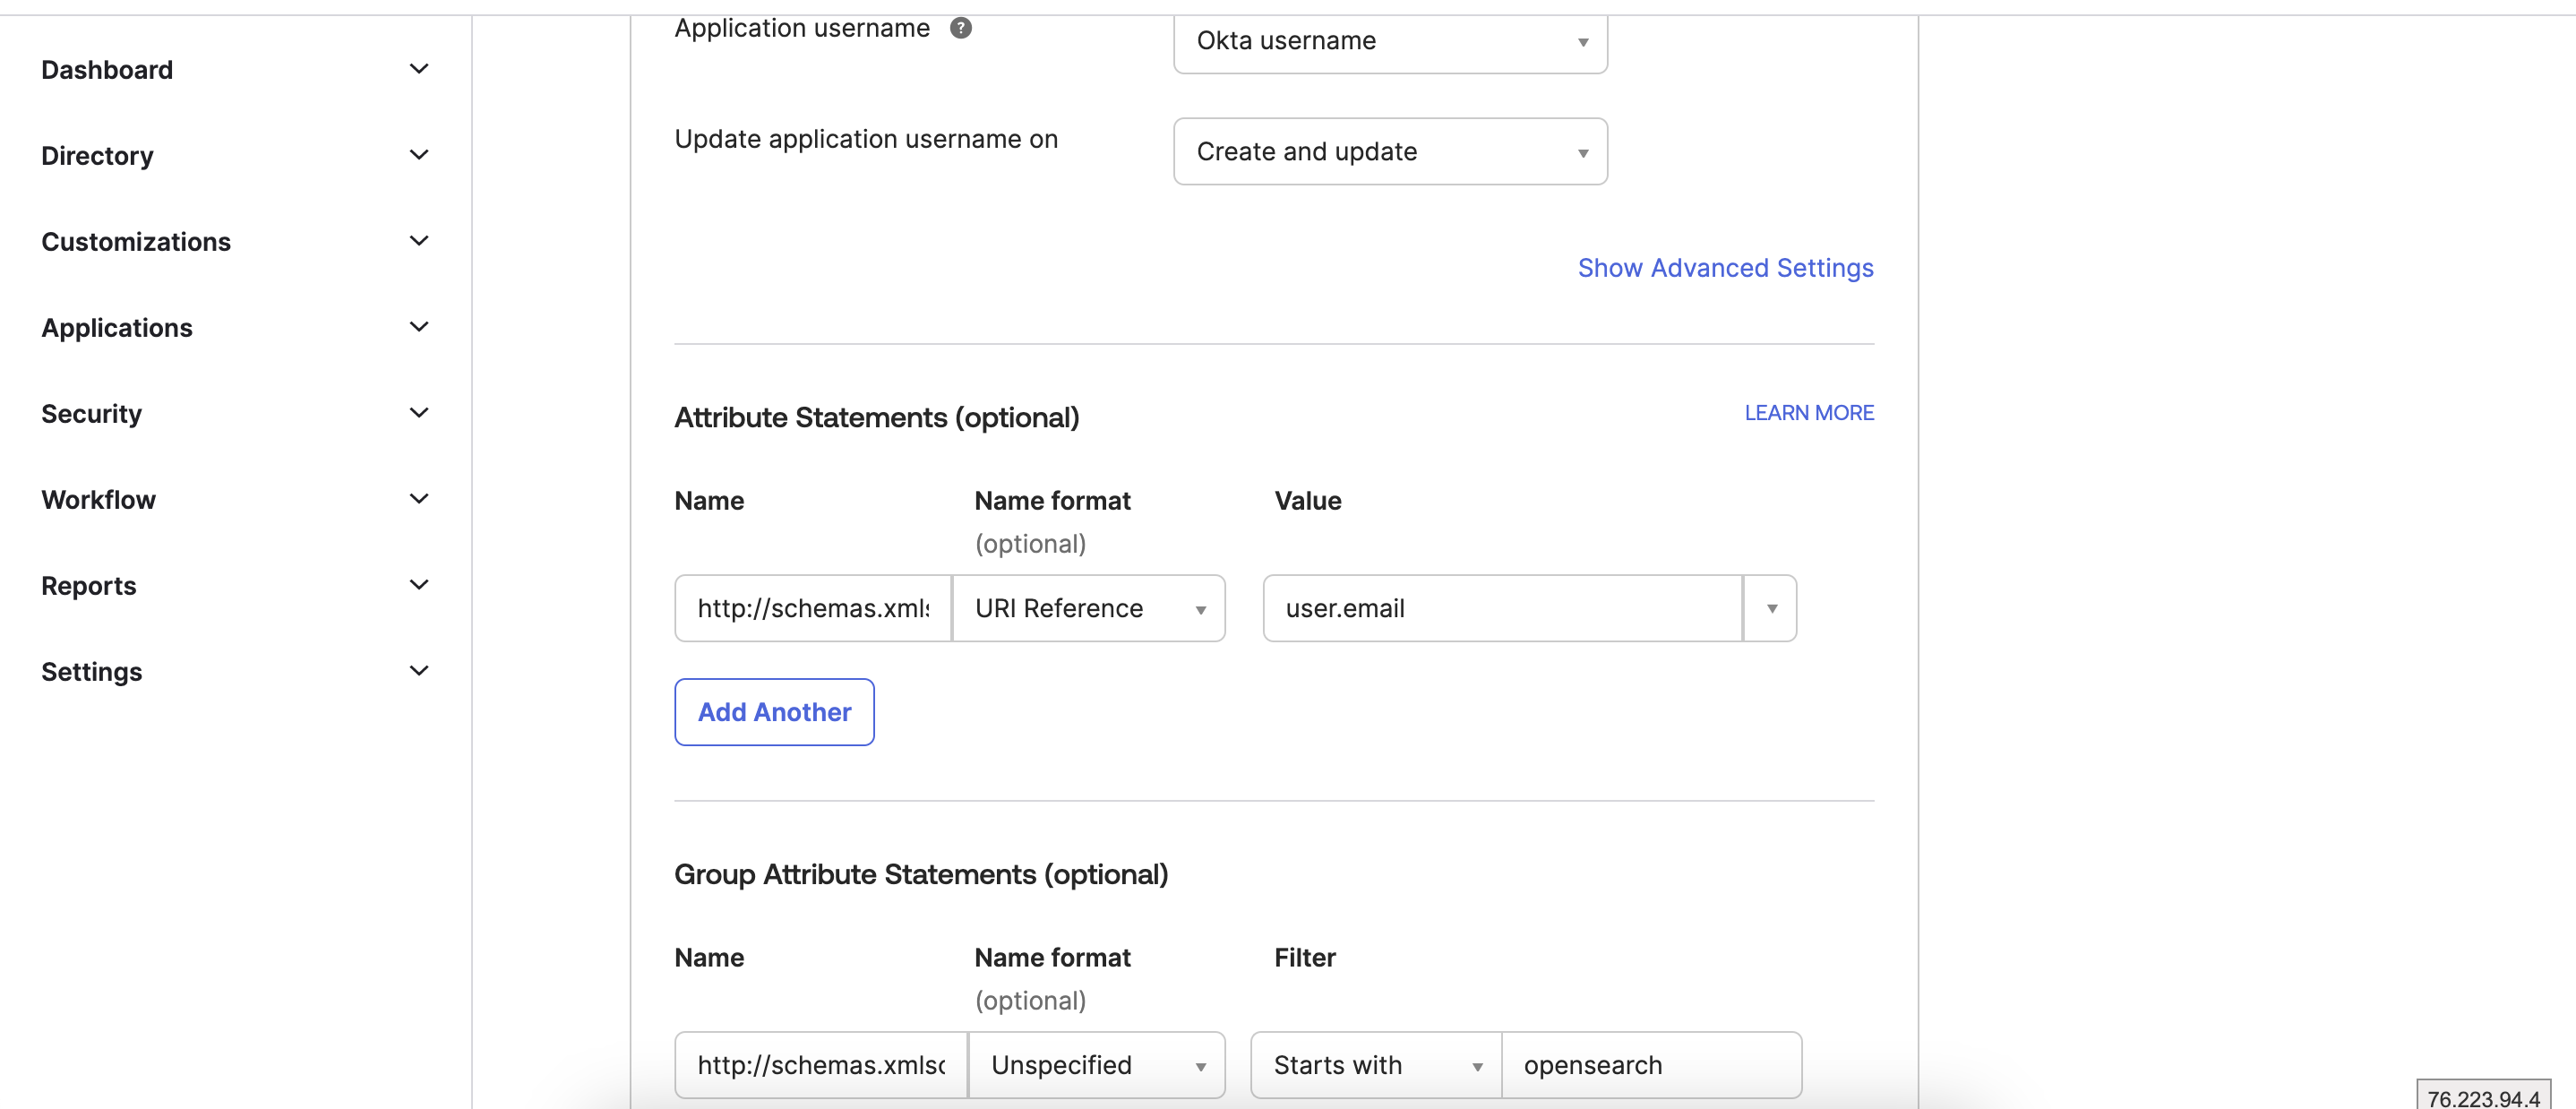
As our both Okta Groups “opensearch-admin” and “opensearch-user” naming starts with string opensearch. Here while configuring group section, we defined opensearch in Group attribute and used filter Starts with to catch both groups.
Are you a customer or partner? Tick on “I’m a software vendor. I’d like to integrate my app with Okta” » Finish
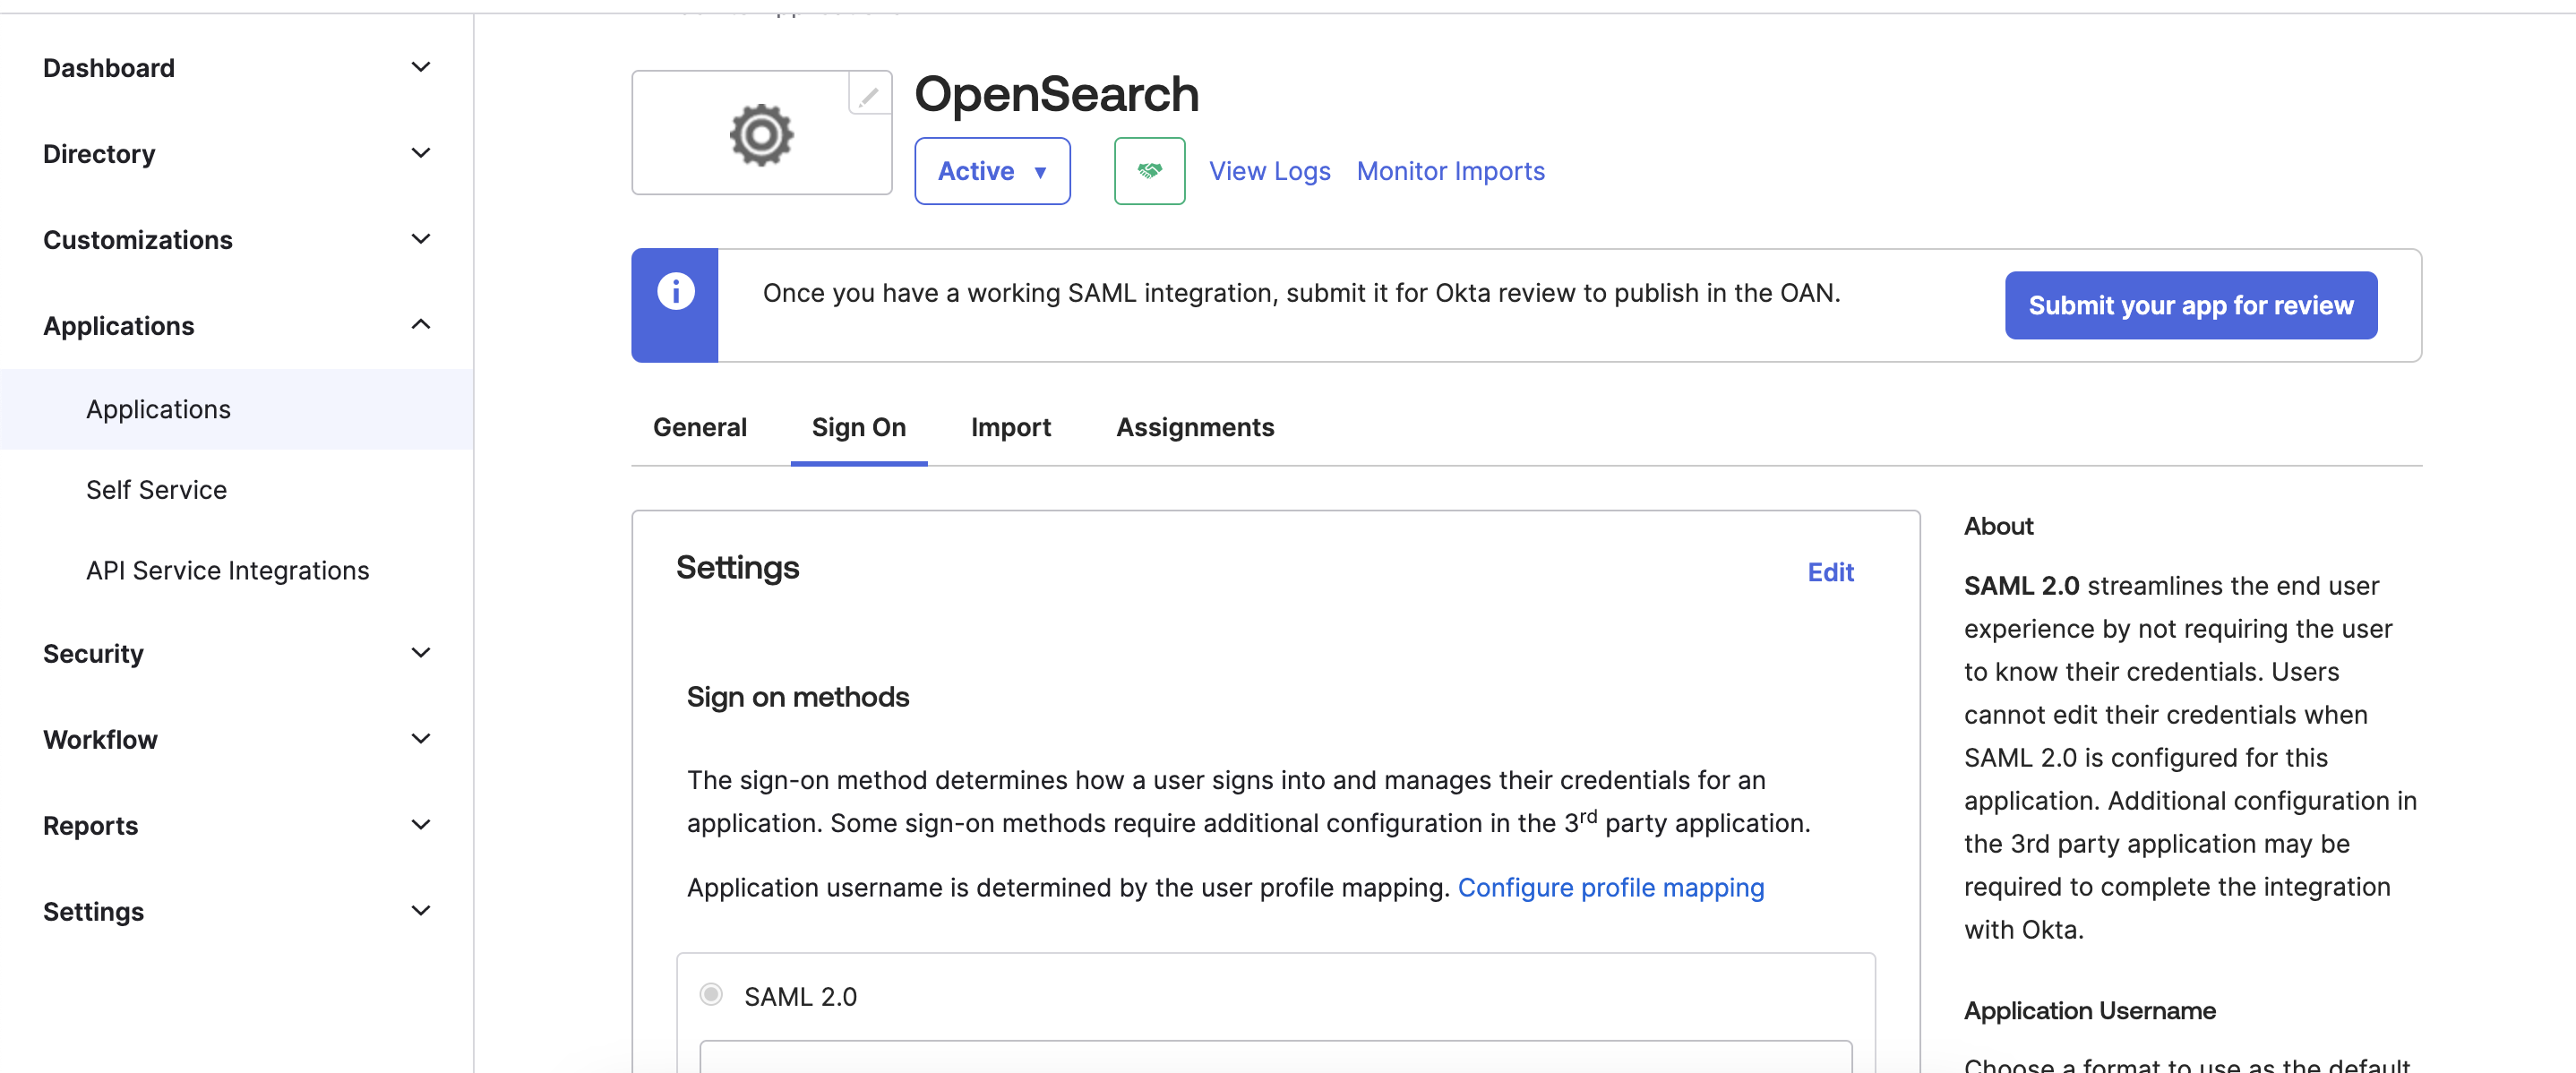
Choose Sign on menu. Under SAML Setup: Click on “View SAML setup instructions”
Go down and select and copy all the content of IDP metadata section. This is an Okta Identity provider metadata for SAML configutation. We have to use this XML content in OpenSearch service. Copy below XML information from the box to somewhere for now.

Assign Groups to Application “OpenSearch”:
Go to option Assignments menu and click on assign » Assign to Groups
Choose both groups “opensearch-admin” and “opensearch-user”. Click on Assign
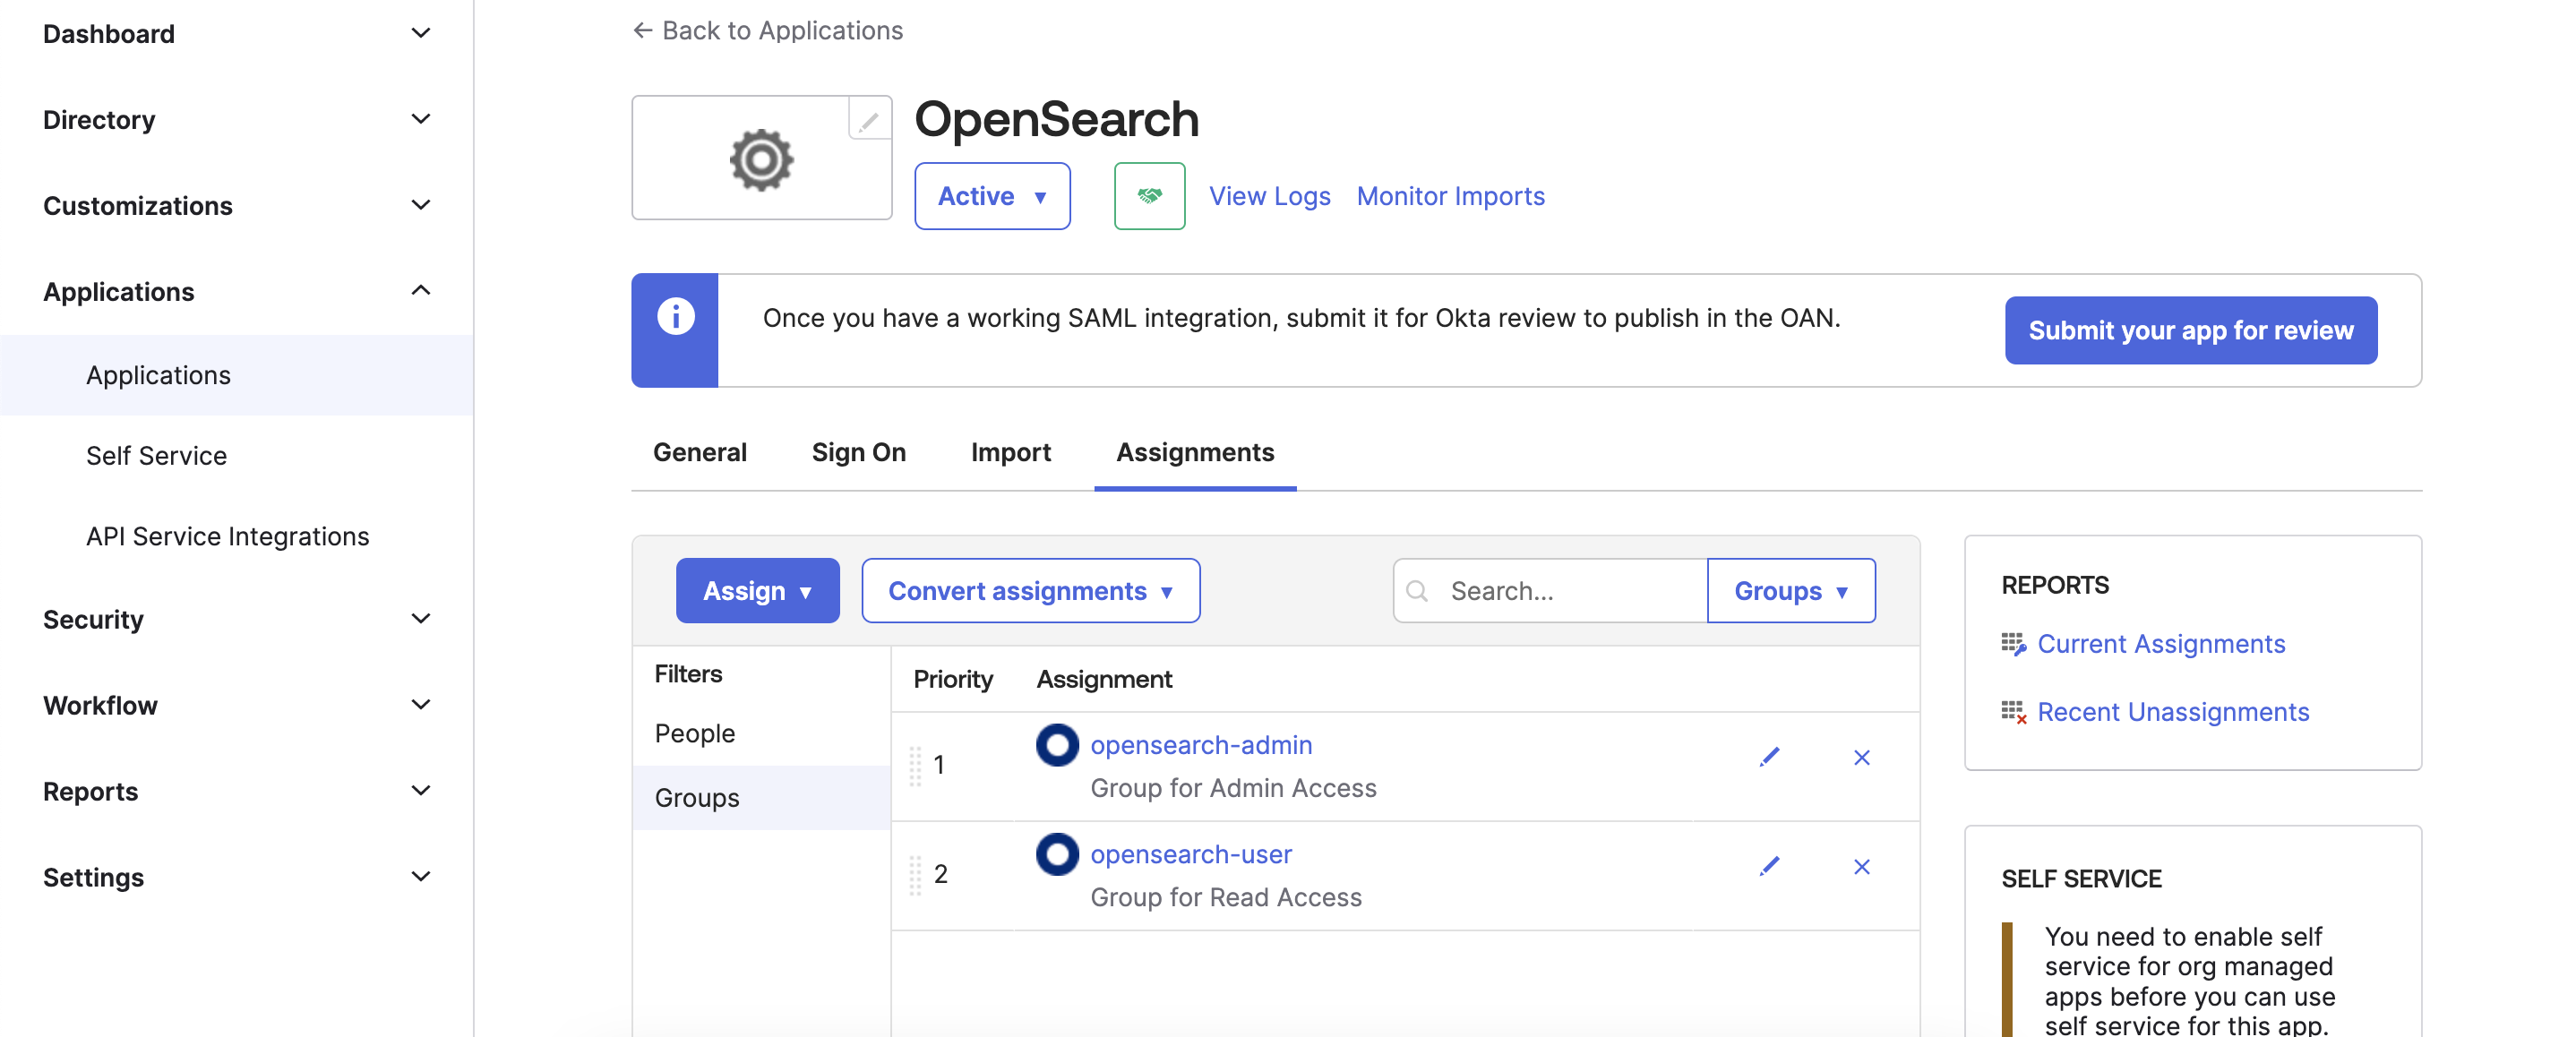
As you can see now both groups are assigned to application OpenSearch.
Back to AWS OpenSearch domain SAML authentication options
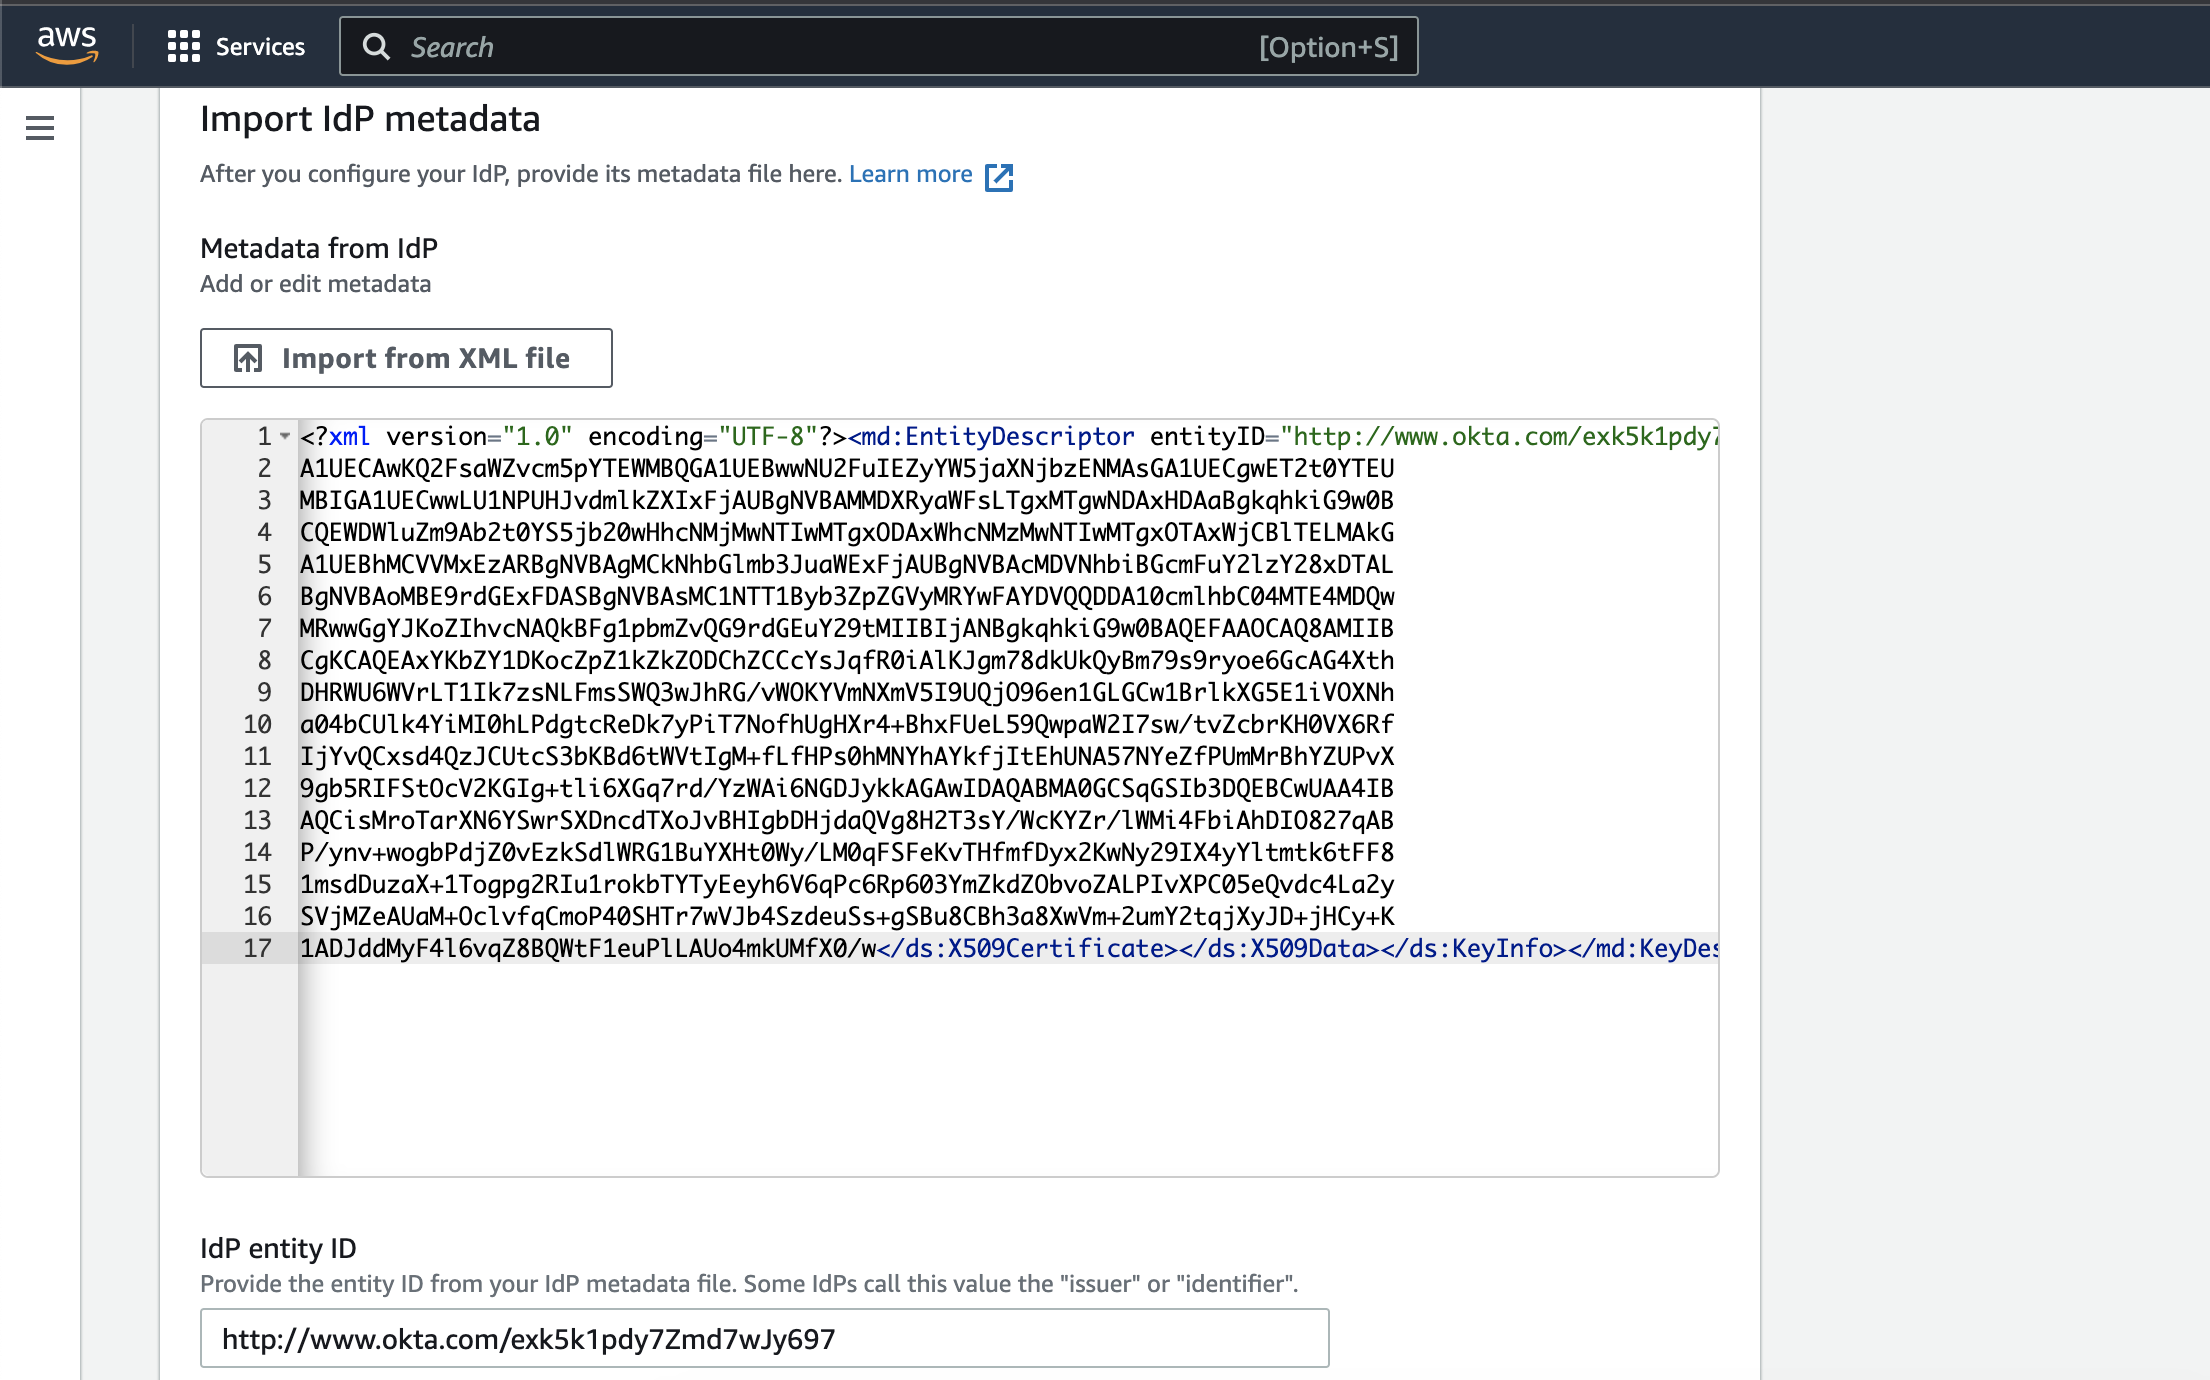
Under the Import IdP metadata section:
Metadata fromm IdP: Copy the Okta Identity Provider metadata which we copied earlier here in the IdP box.
IdP entity ID: It will auto populate once you provide IdP metadata.
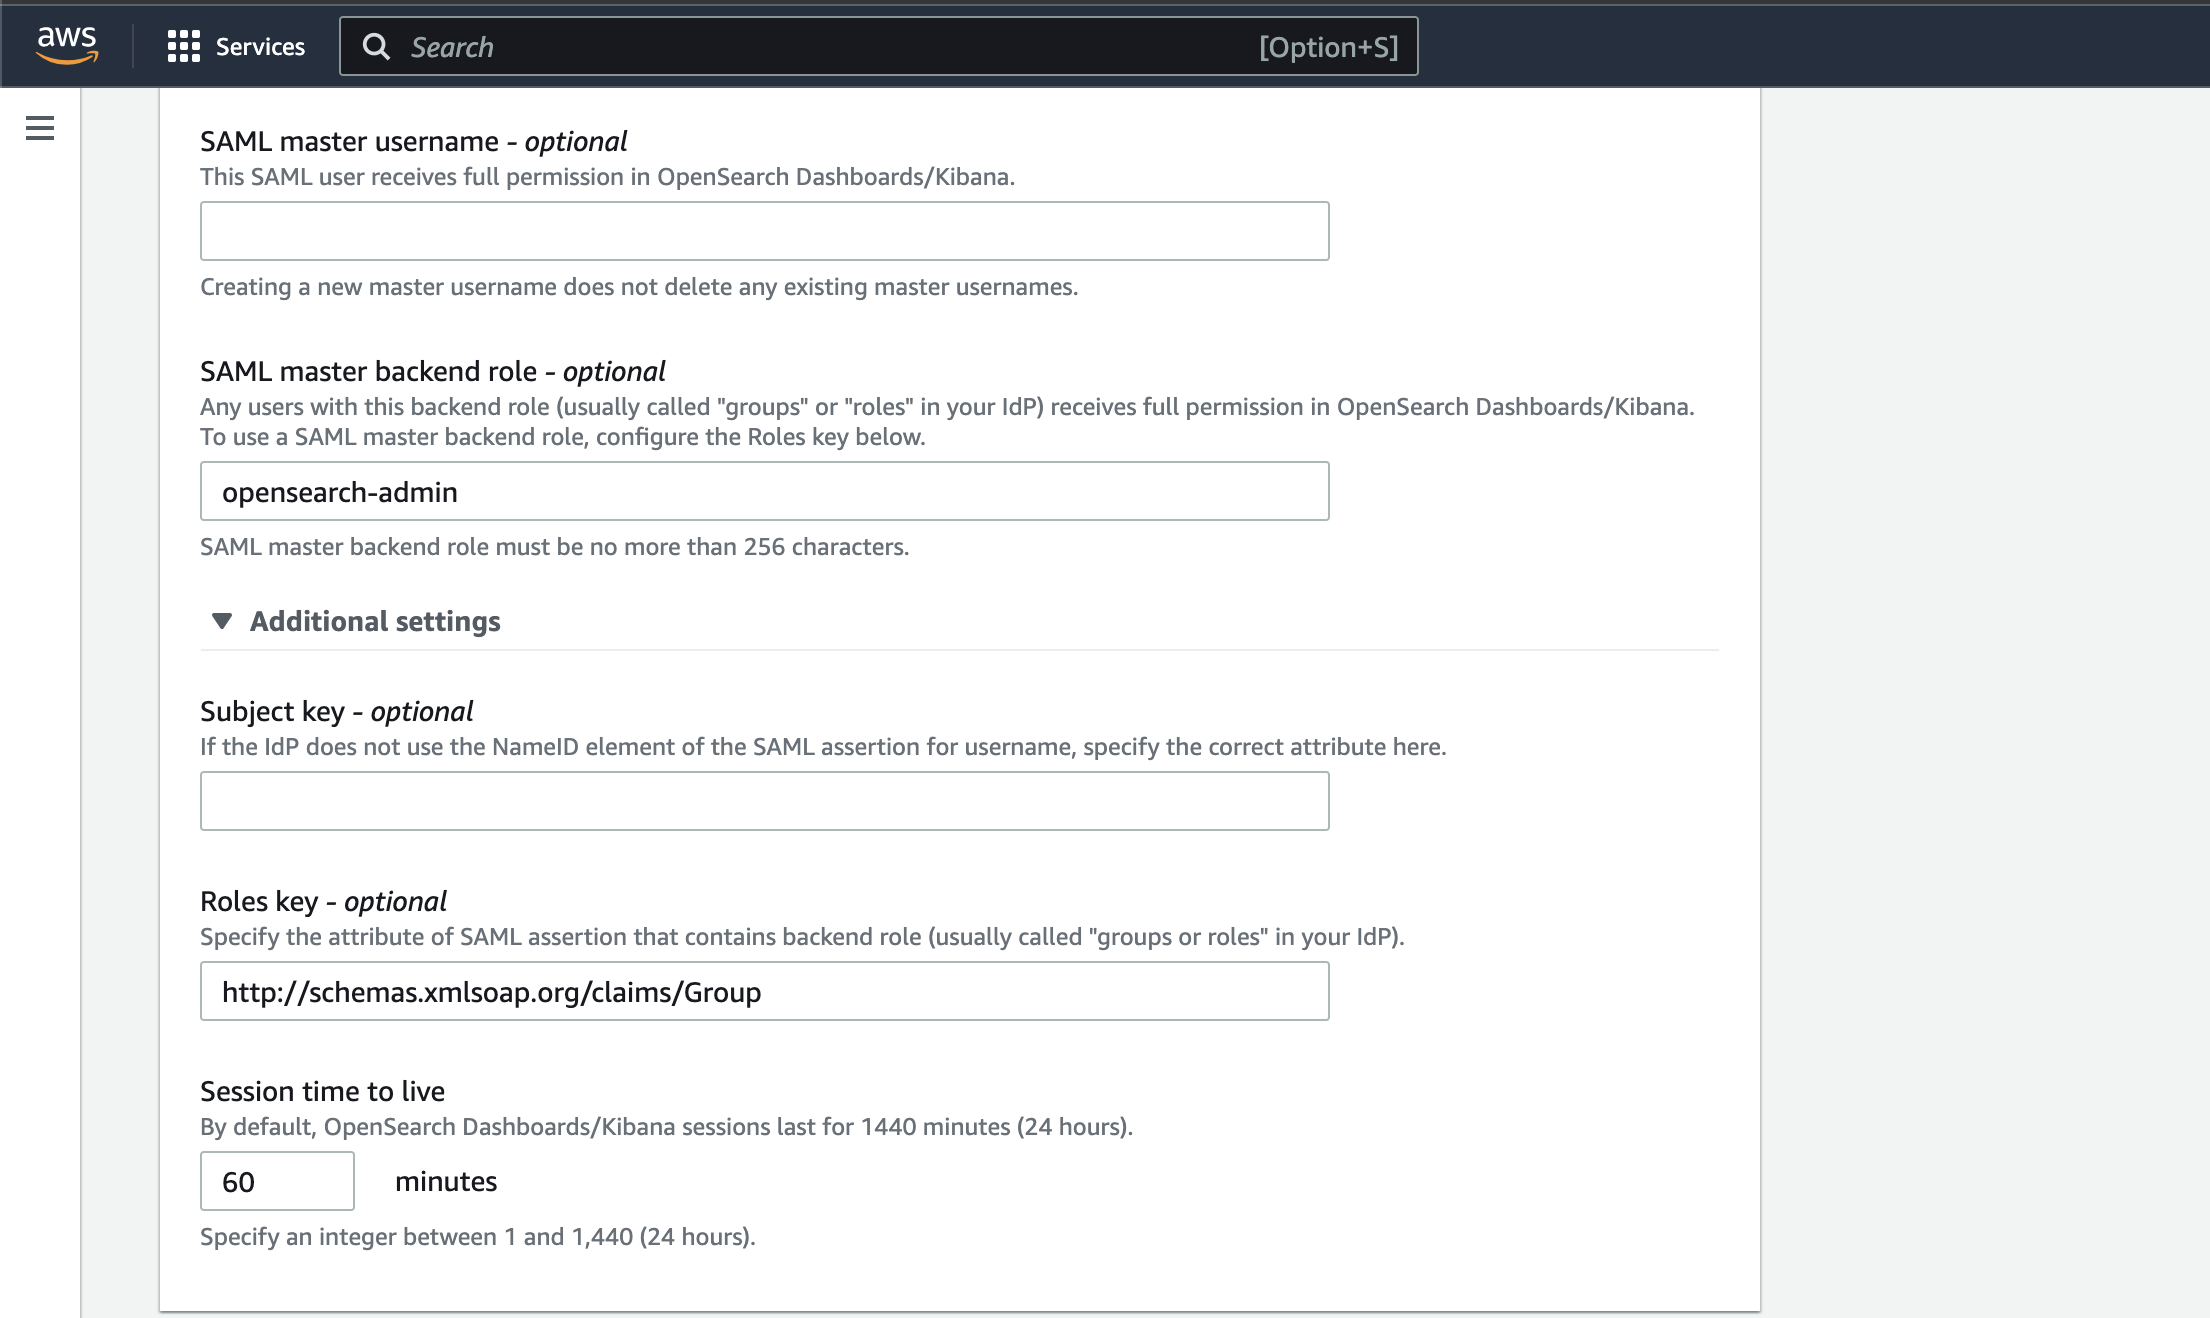
SAML master username - optional: Leave it blank.
SAML master backend role - optional: opensearch-admin (Okta group which need full permission in OpenSearch Dashboard.)
Click on Additional settings:
Subject key - optional: Leave it blank.
Roles Key - optional: http://schemas.xmlsoap.org/claims/Group
Session time to live: 60 minutes
and save the changes.
Validate Okta users access and RBAC
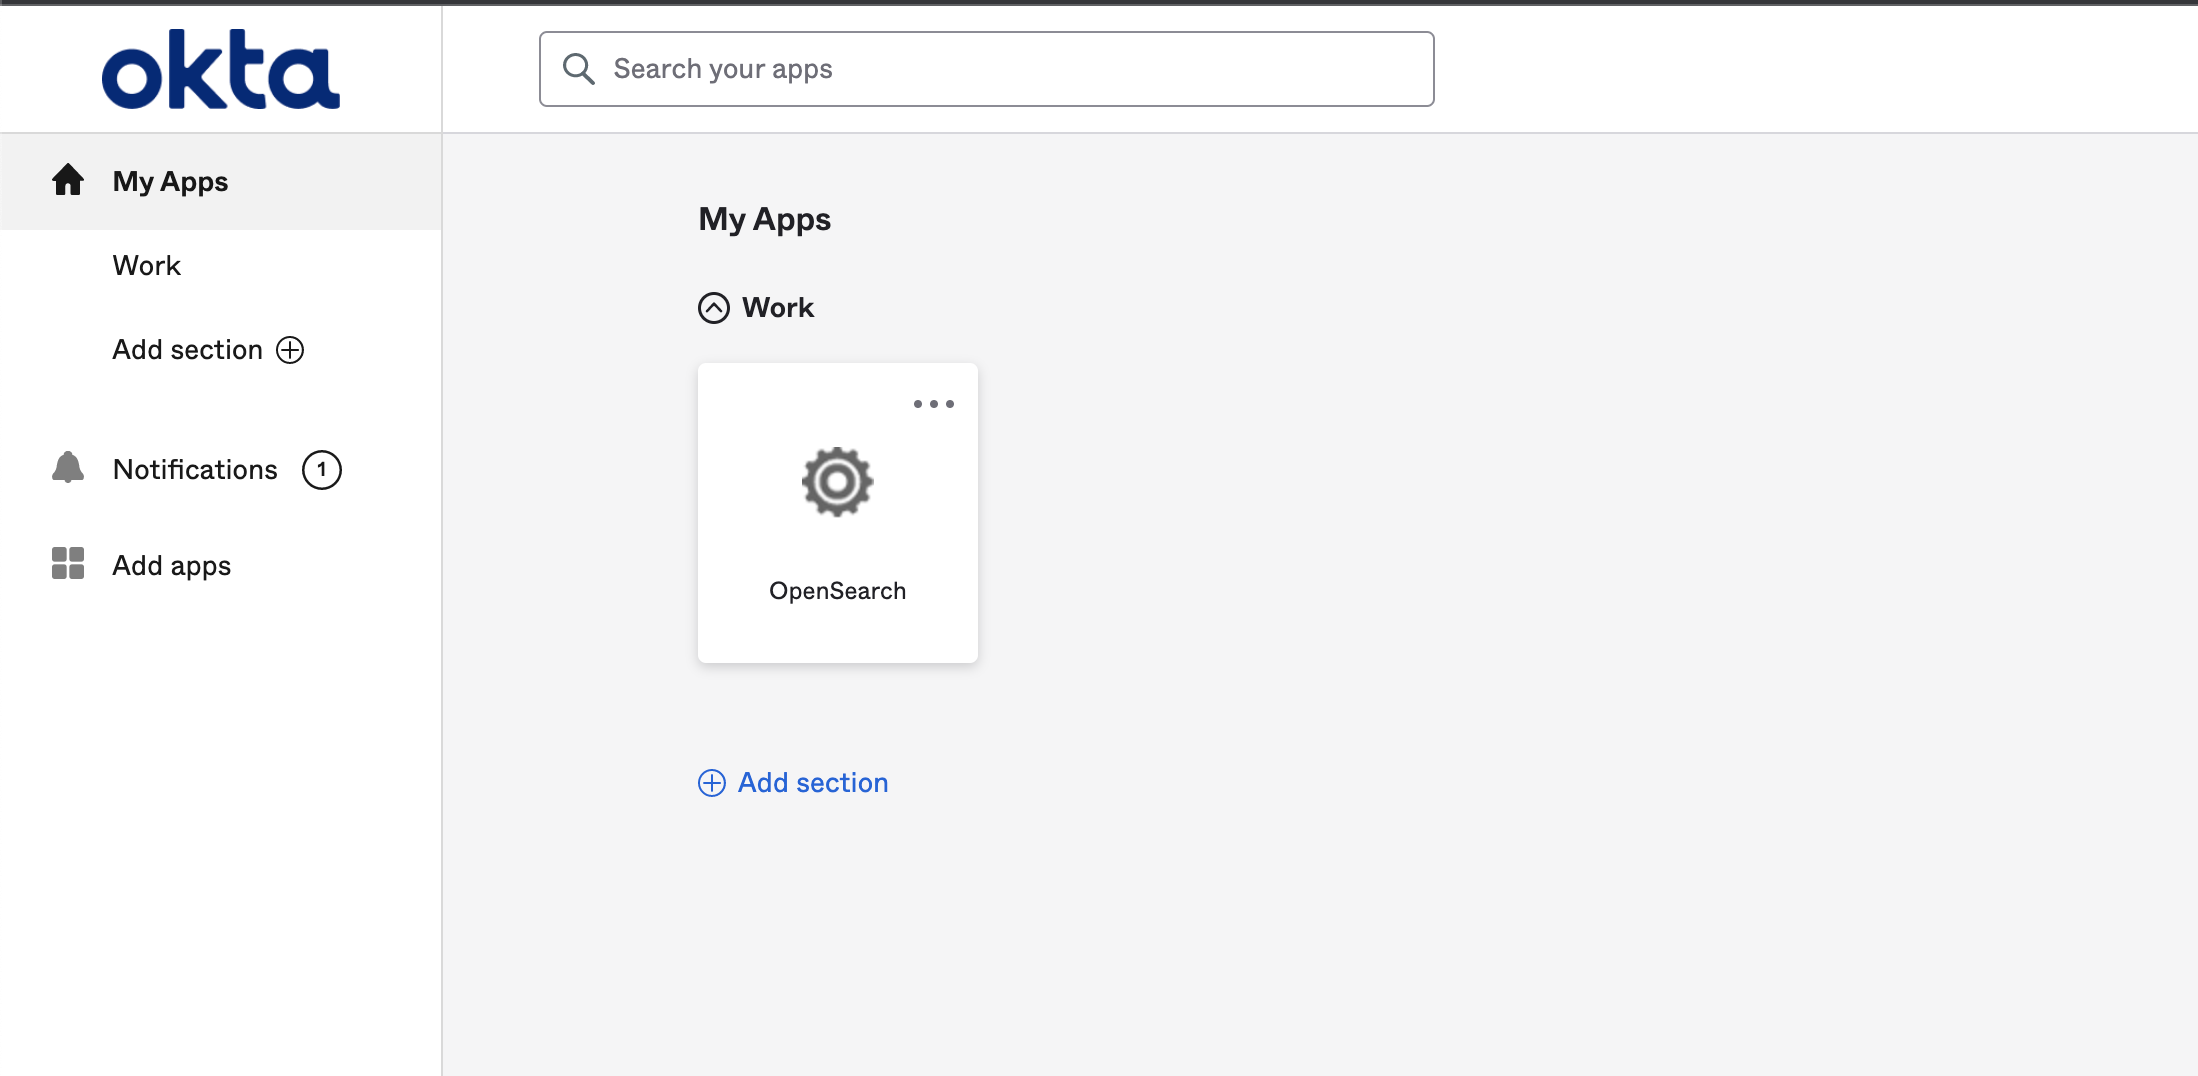
Now login the Okta dashboard from your user “bidhan.khatri”.
Click on “My Apps” » under “work” » click on “OpenSearch” app to open the AWS OpenSearch Dashboard. User will get full access as user “bidhan.khatri” belongs to okta group “opensearch-admin”
All the users belongs to okta group “opensearch-admin” will receive full permission in OpenSearch Dashboard. We have defined to get full access for “opensearch-admin” while configuring SAML for AWS OpenSearch domain.
Similary, We can setup Role-based access control (RBAC) using Okta Group based on the OpenSearch Role. For okta group “opensearch-user” to give Read Only access in all index in OpenSearch dashboard, we have to login OpenSearch Dashboard with full permission user first and create a role in OpenSearch for “opensearch-user” group and map to it.
Give READ Access to Group “opensearch-user”
First, login OpenSearch from the user belonging to Okta group “opensearch-admin”. We need full permission user access to setup a new role. We will be giving only read permission to all the index to group user “opensearch-user”
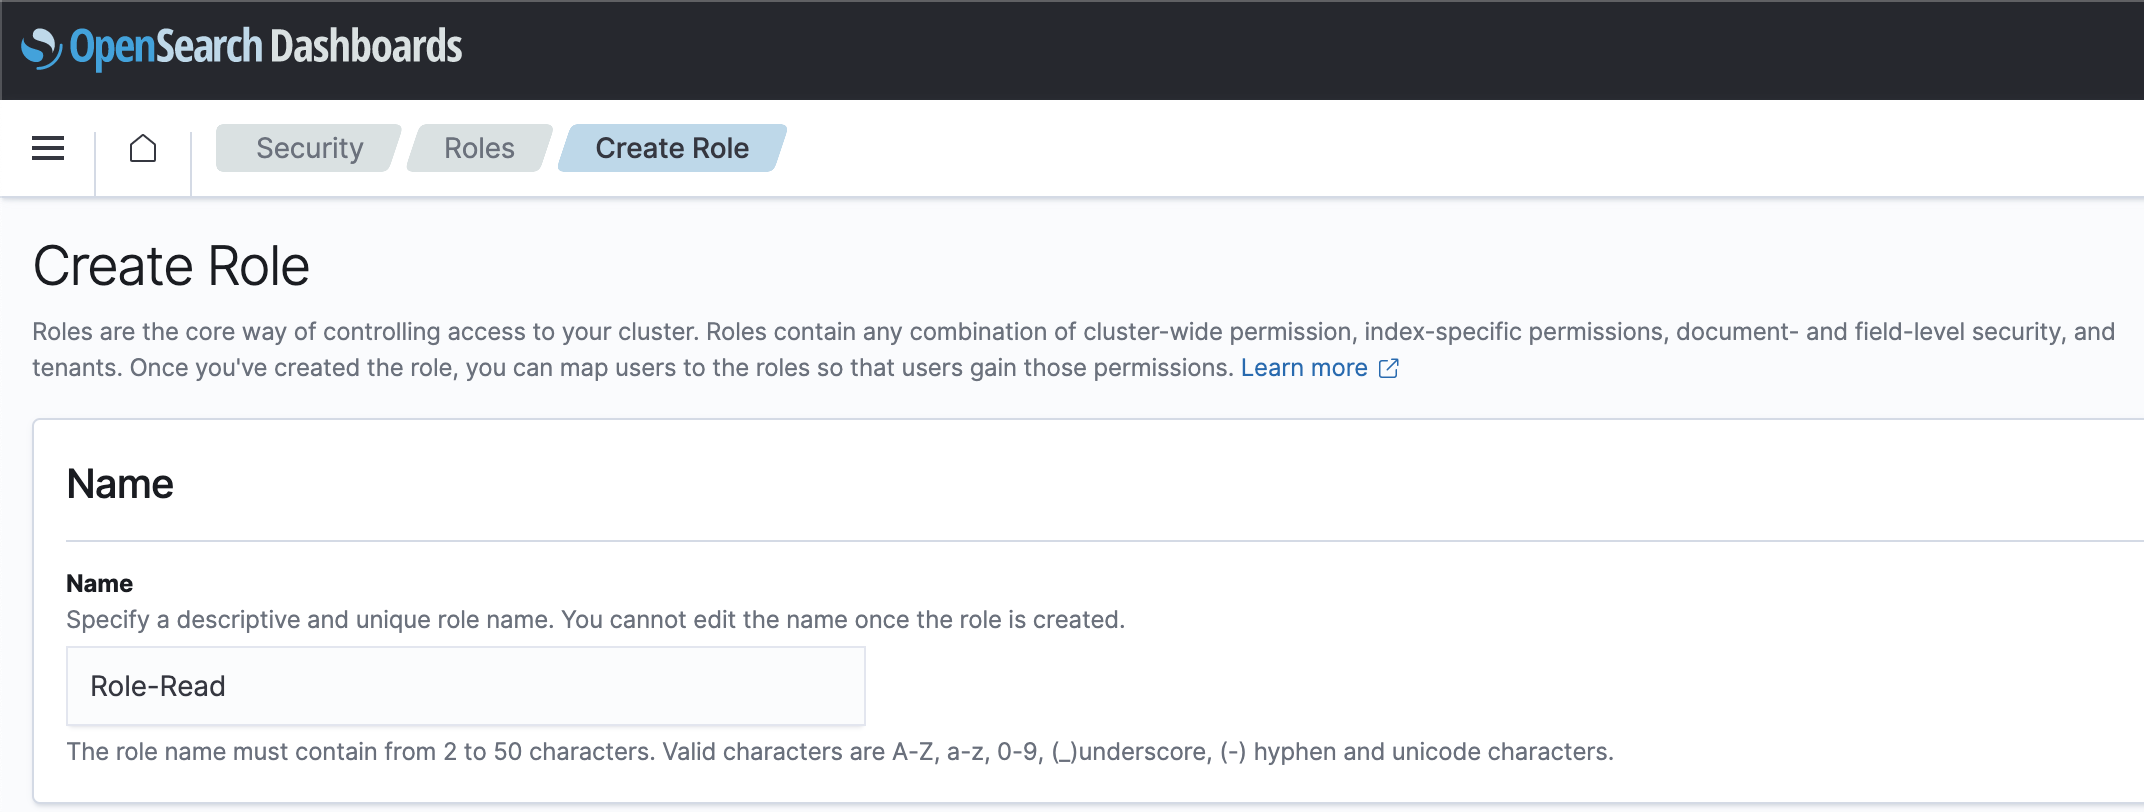
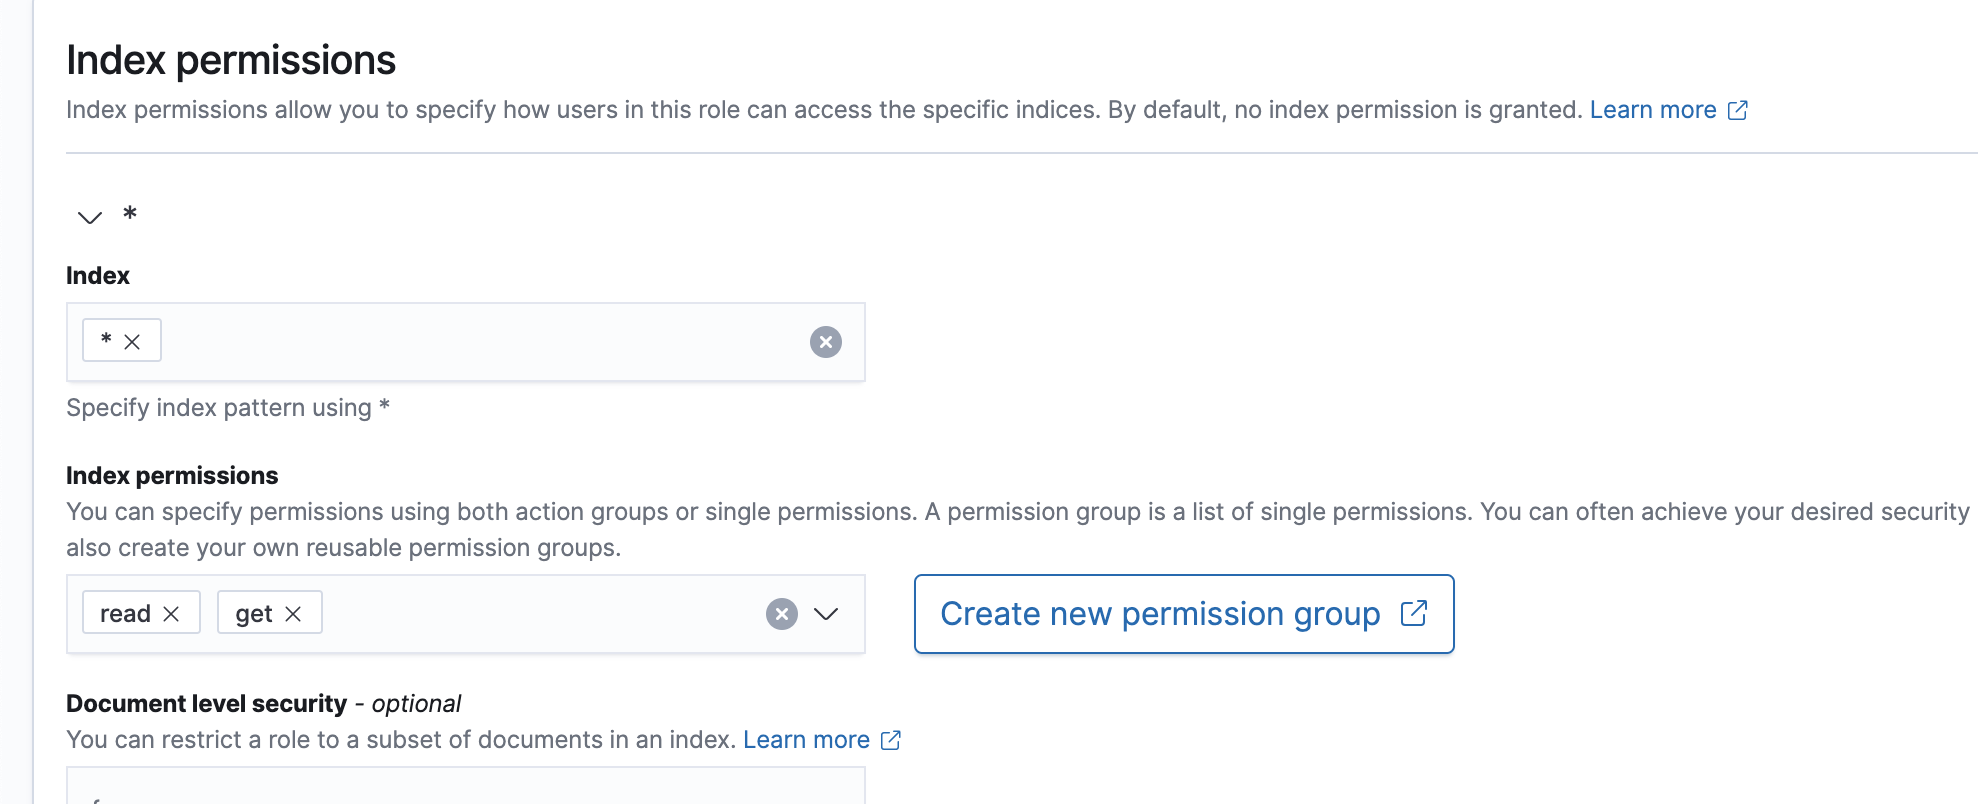
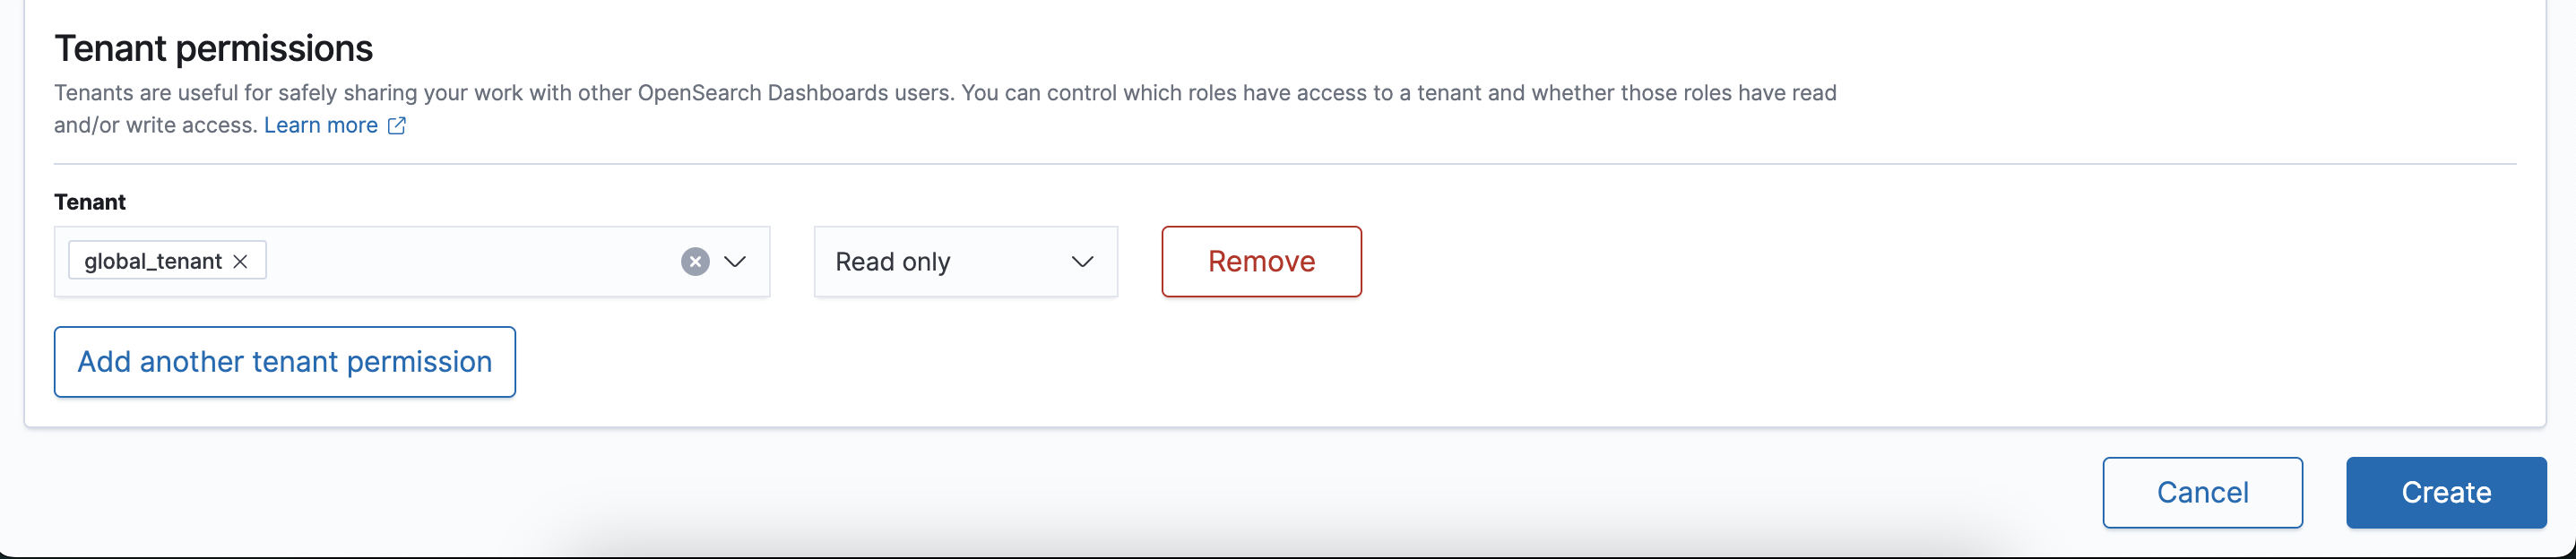
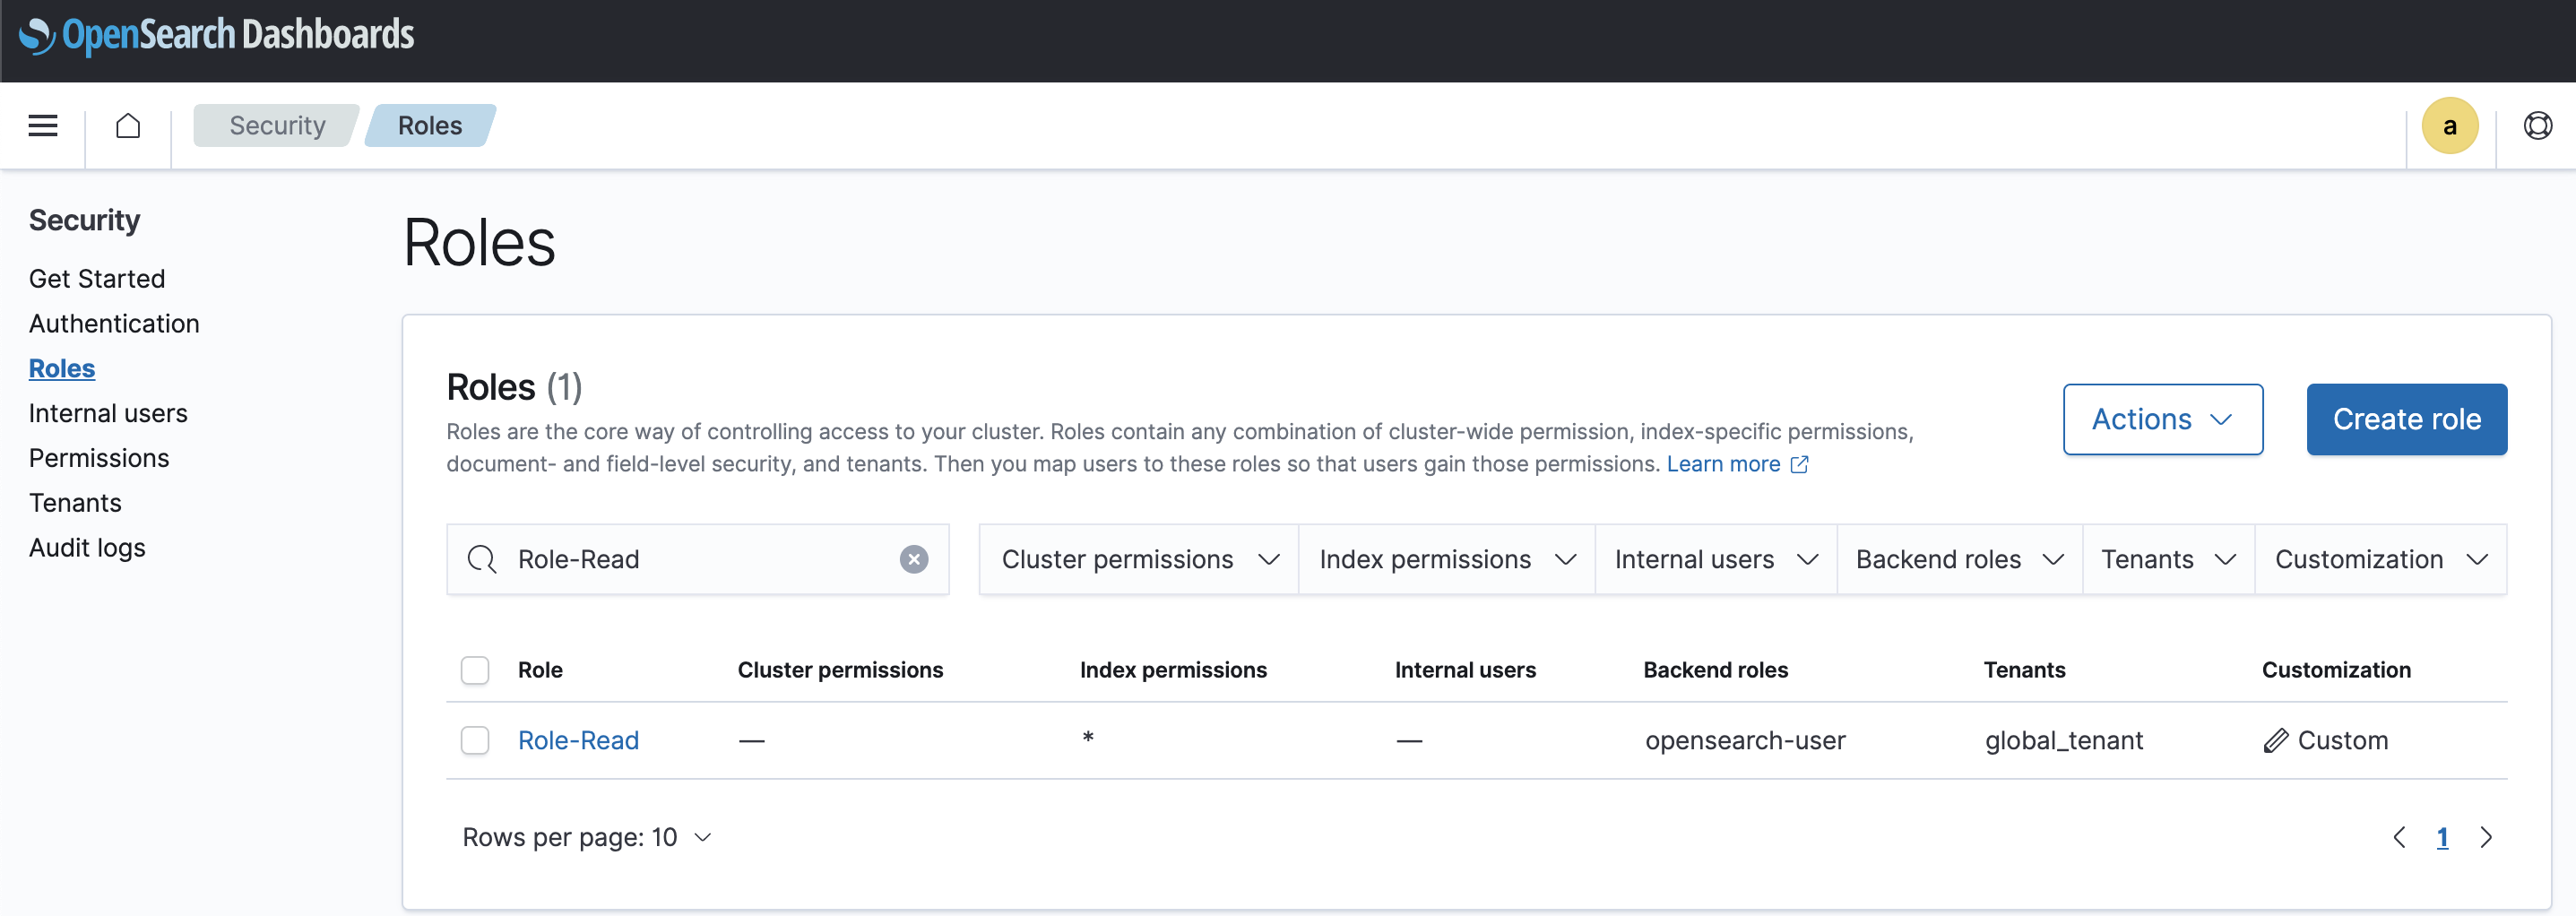
Security » Roles » Create role » Role-Read » Index permissisions
Index: *
Index permmissions: read get
Tenant permissions: global_tenant
click Update
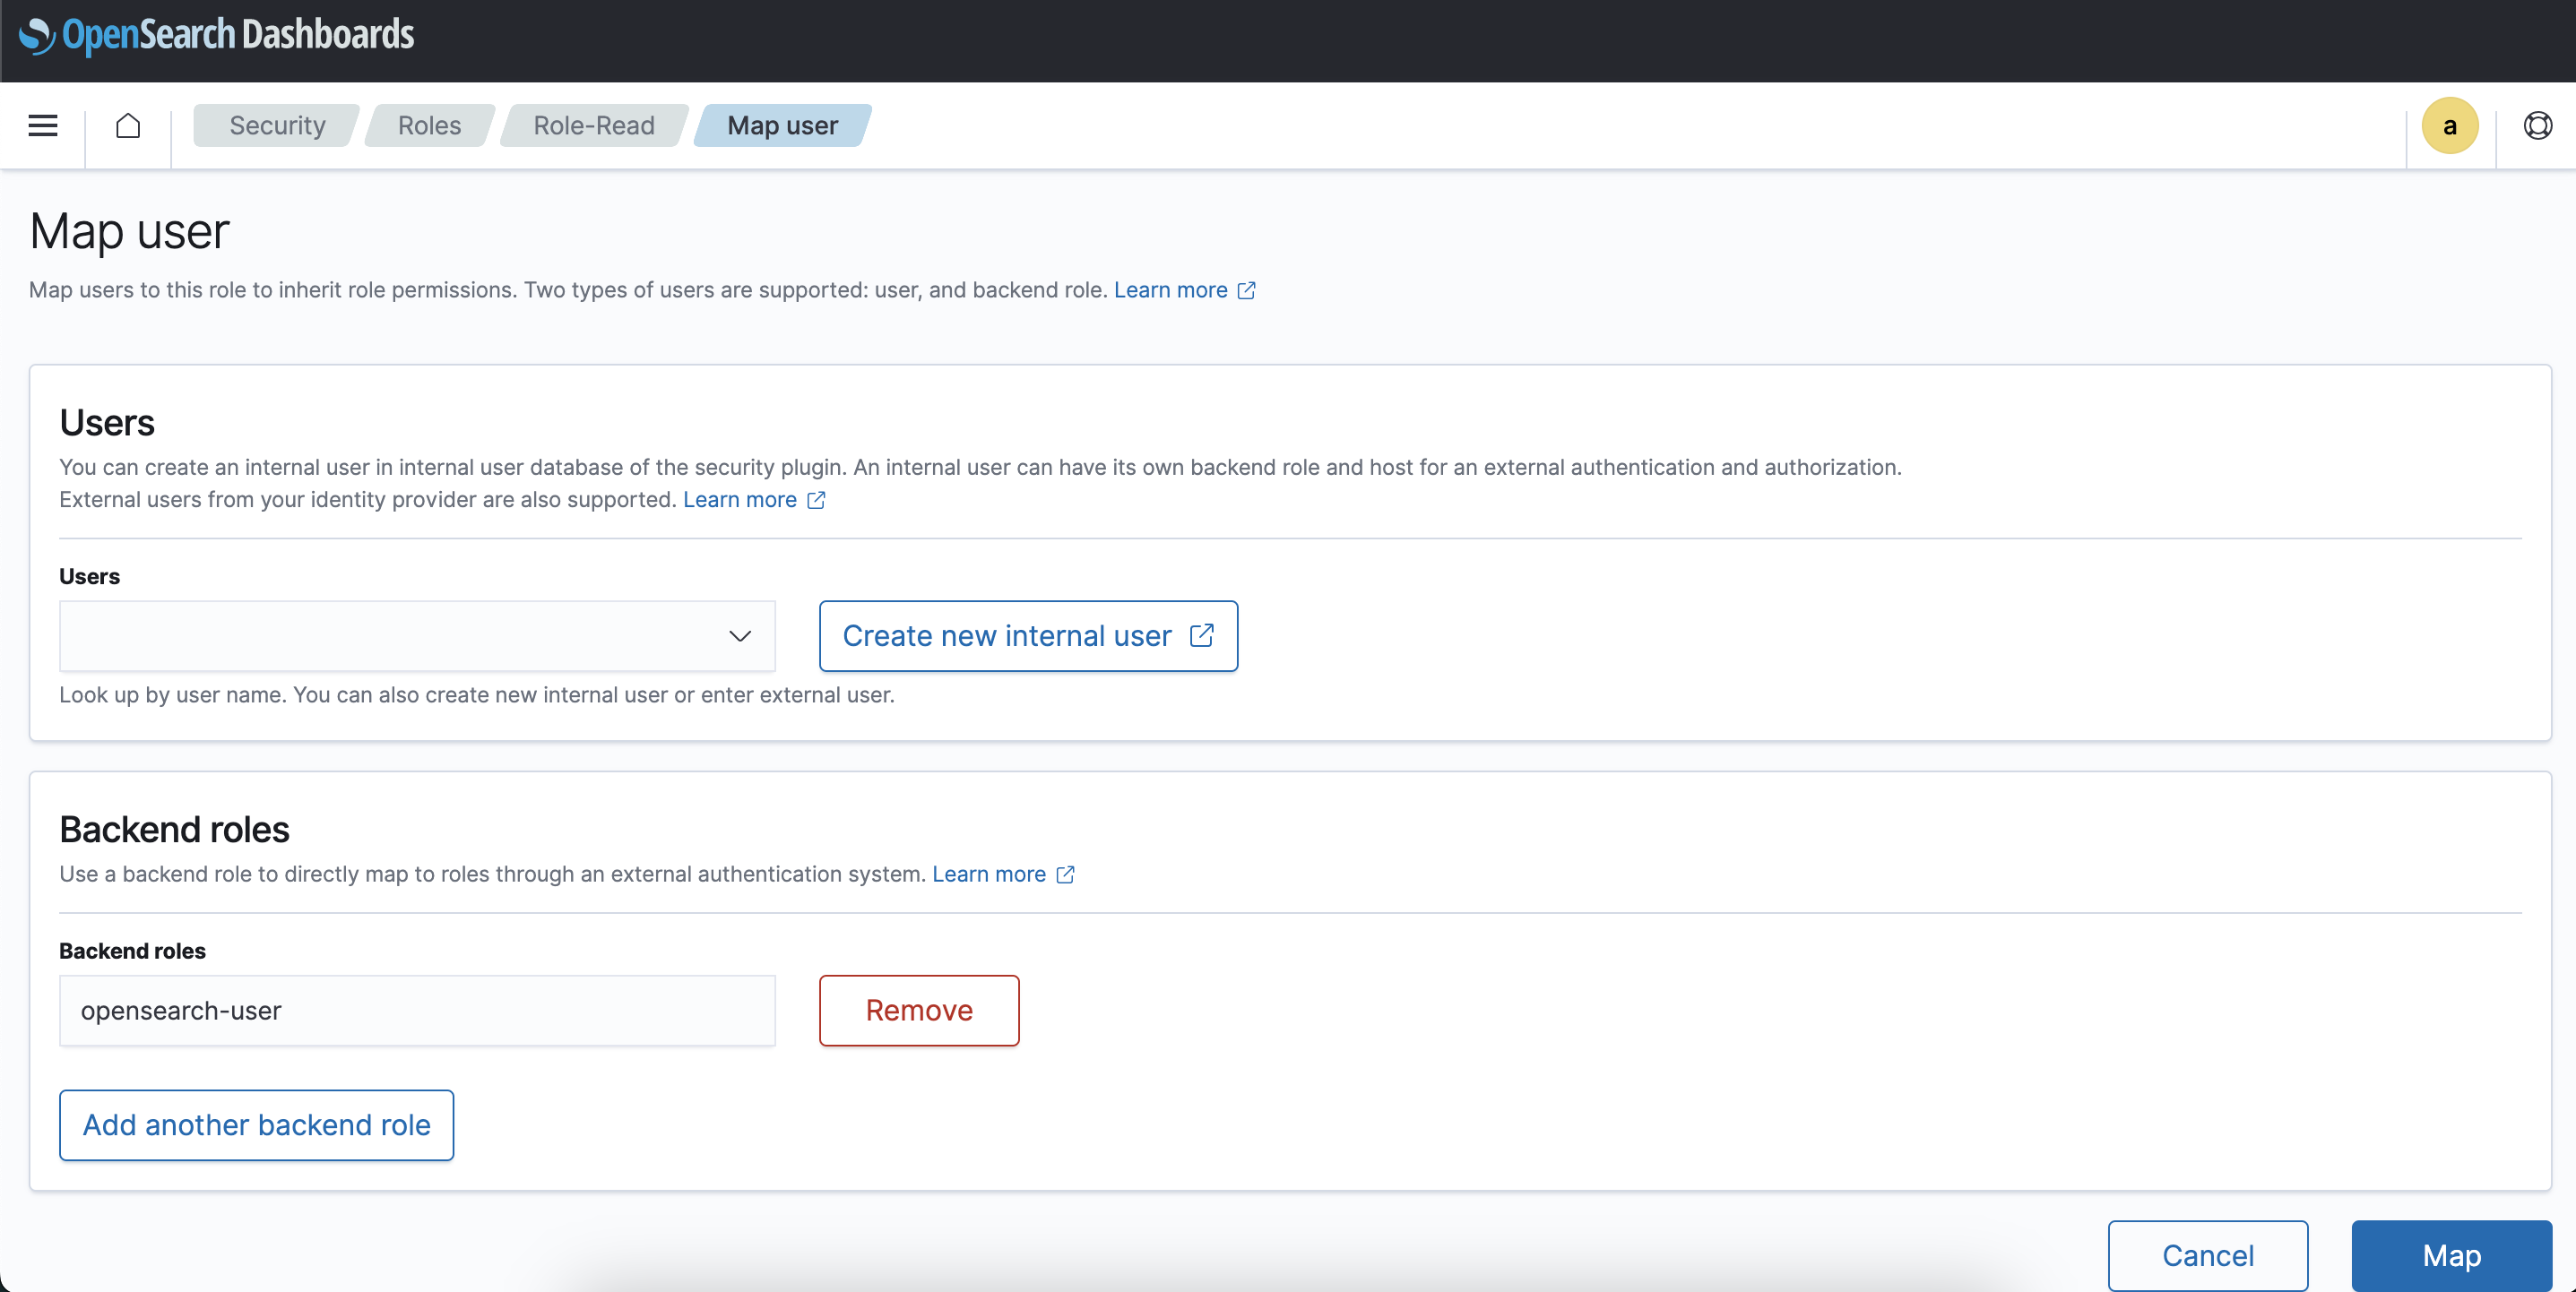
Go to Mapped users » Map users » In Backend roles » Add “opensearch-user” » Map
Backend Role is basically a Group in external authentication system like AD,LDAP with whom OpenSearch role is mapped so that instead of giving access to the 100 different users, we can simply provide access to a single AD group.
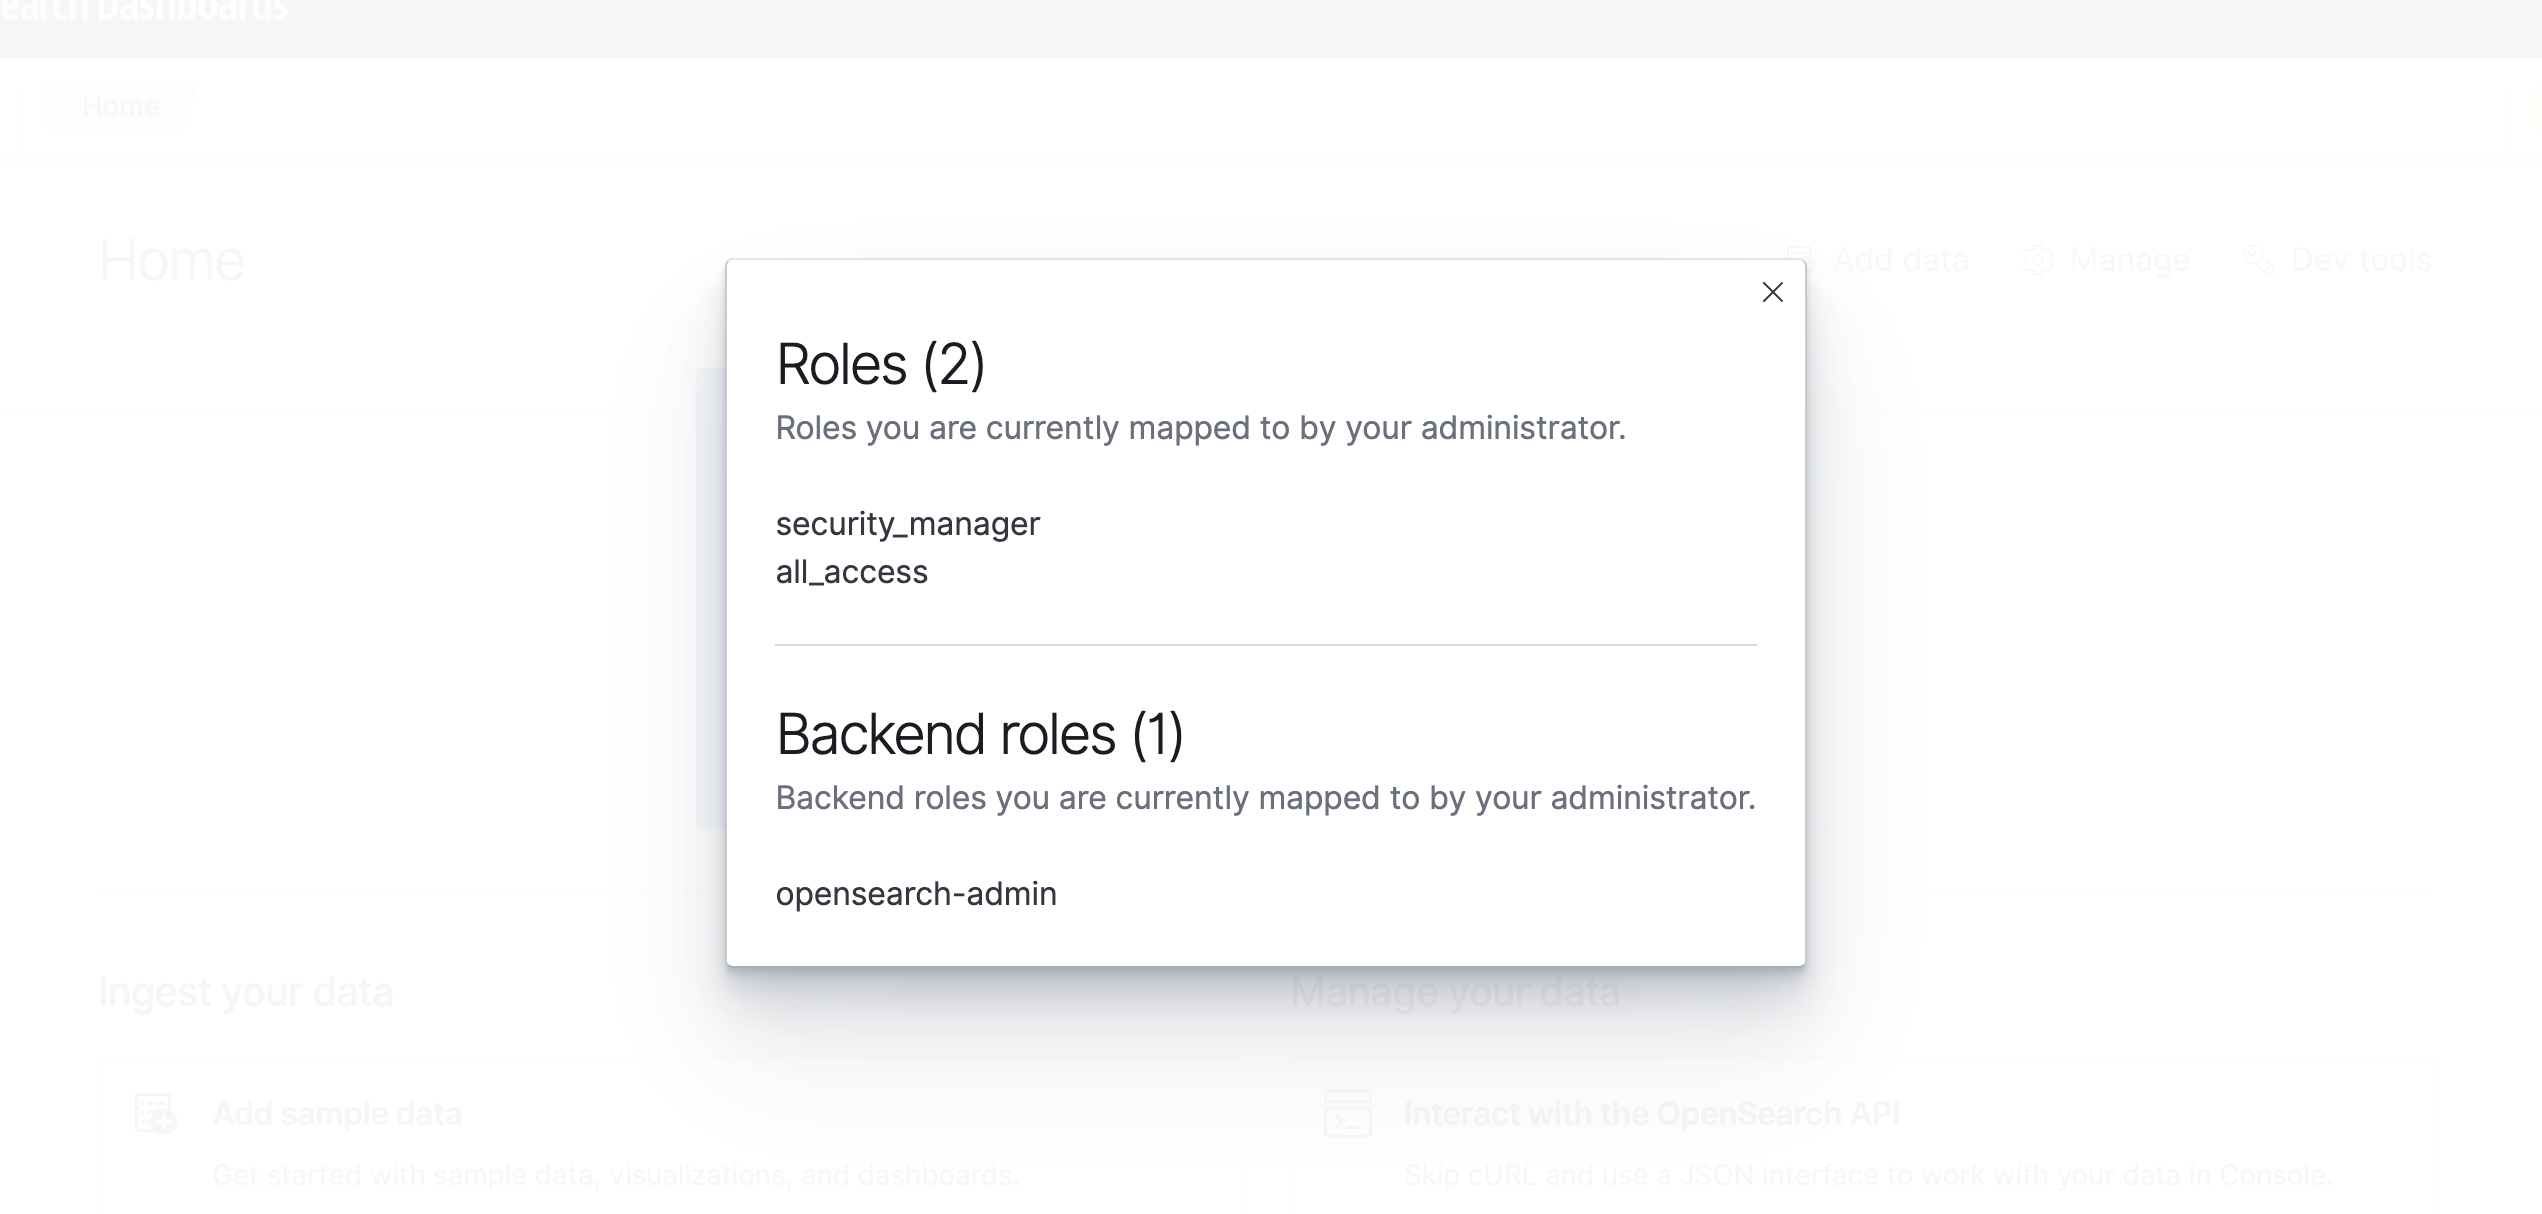
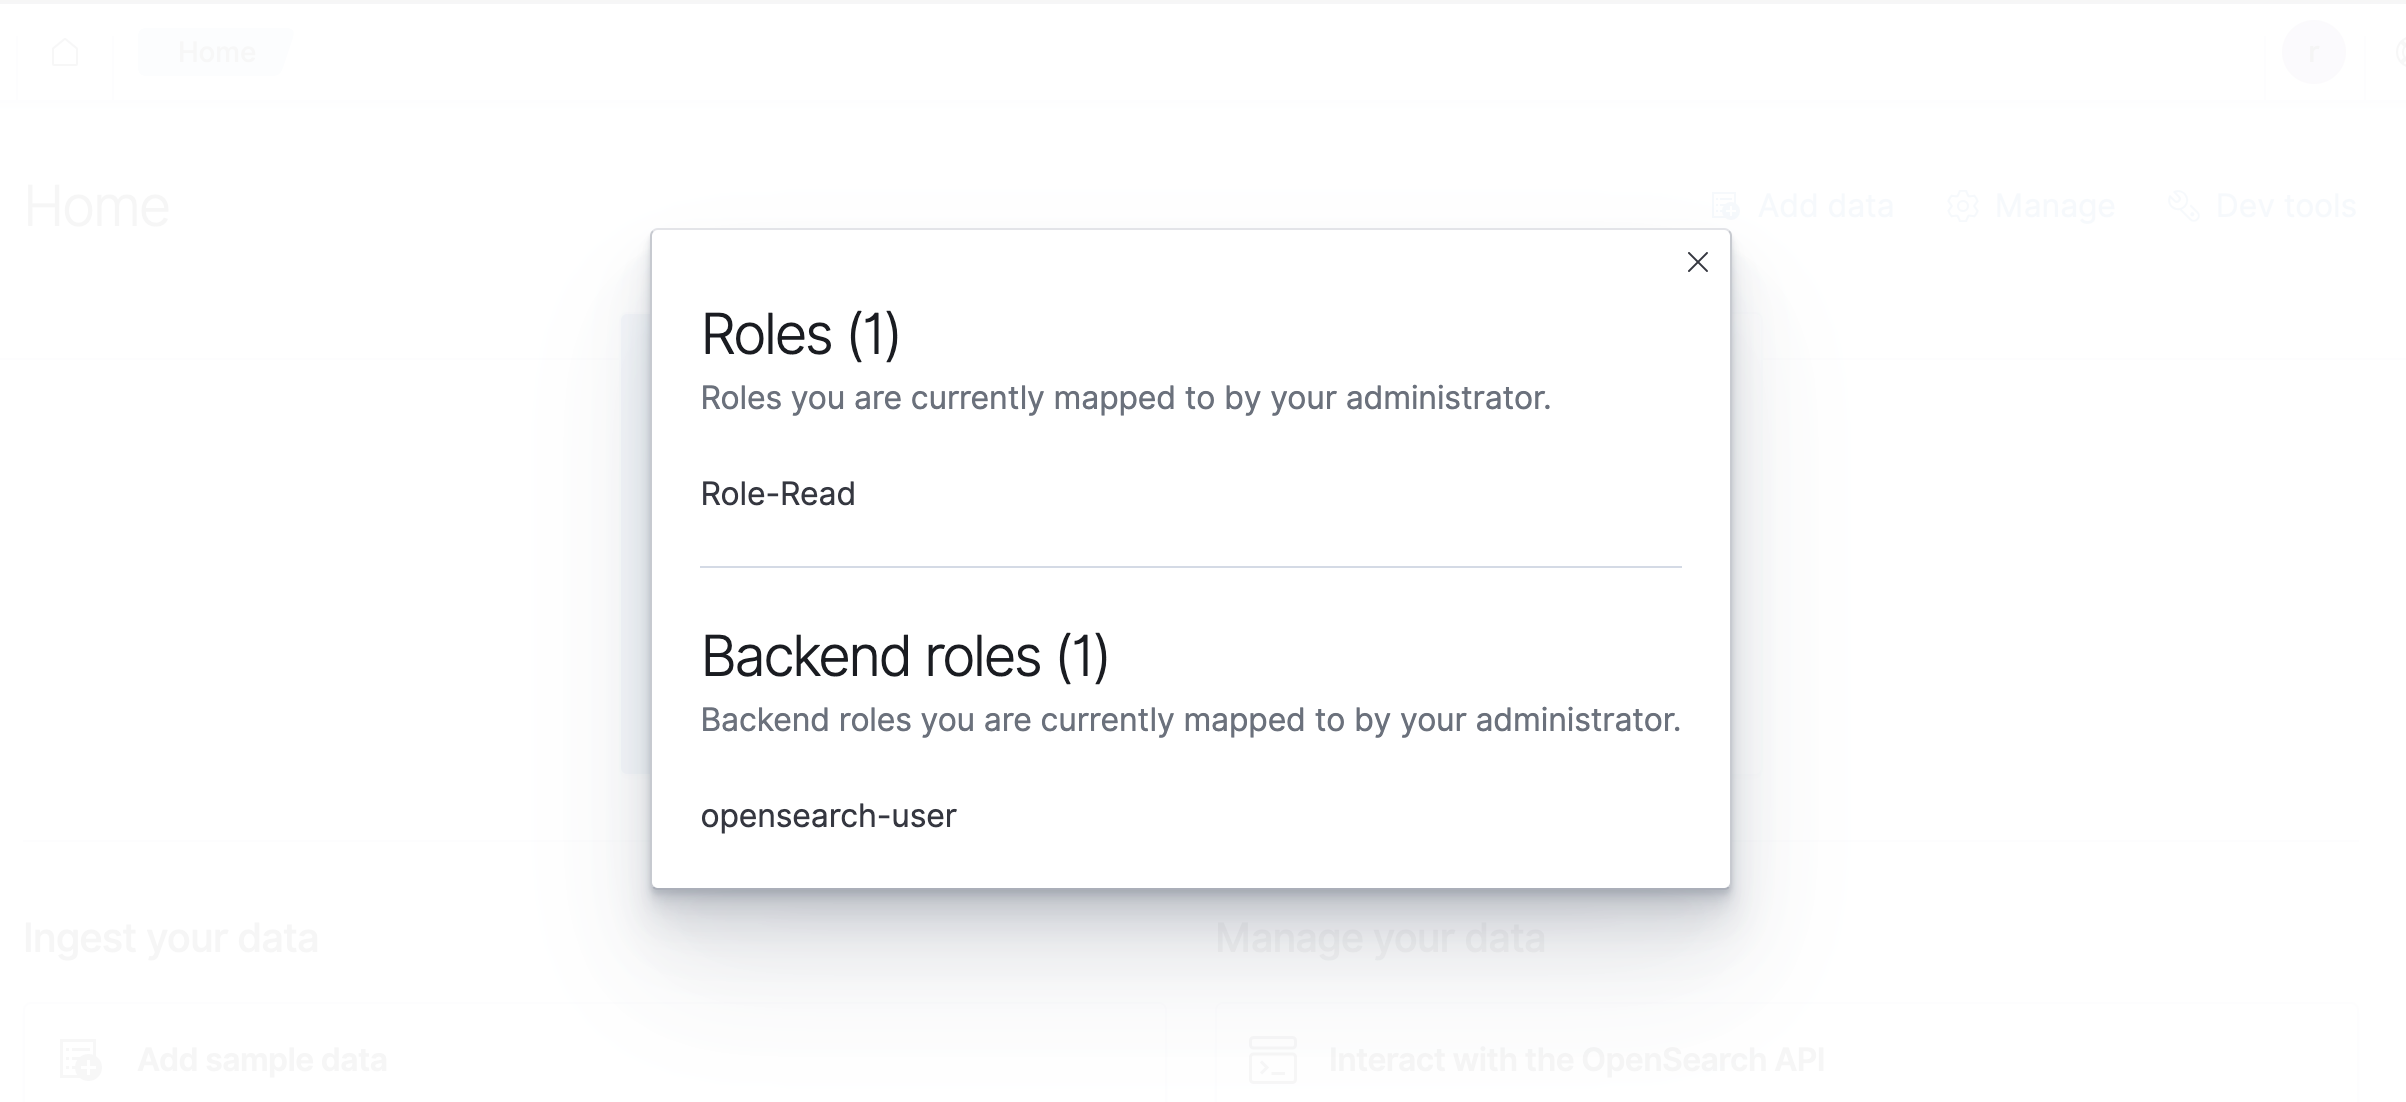
Now once user ram.thapa login OpenSearch Dashboard, he will see only read access given to all the indices.
To check your permission, Click on your user icon » click View roles and identities.”
He will get below roles defined.

Leave a comment